
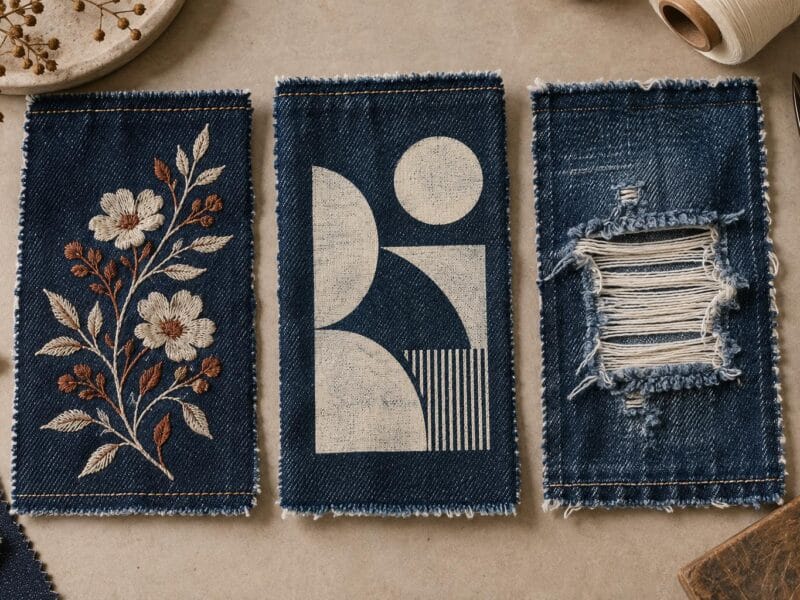
This custom denim guide compares embroidery, screen printing and distressing for clothing brands. Learn how to choose a surface finish, plan the wash sequence, prepare artwork and approve samples before bulk production.
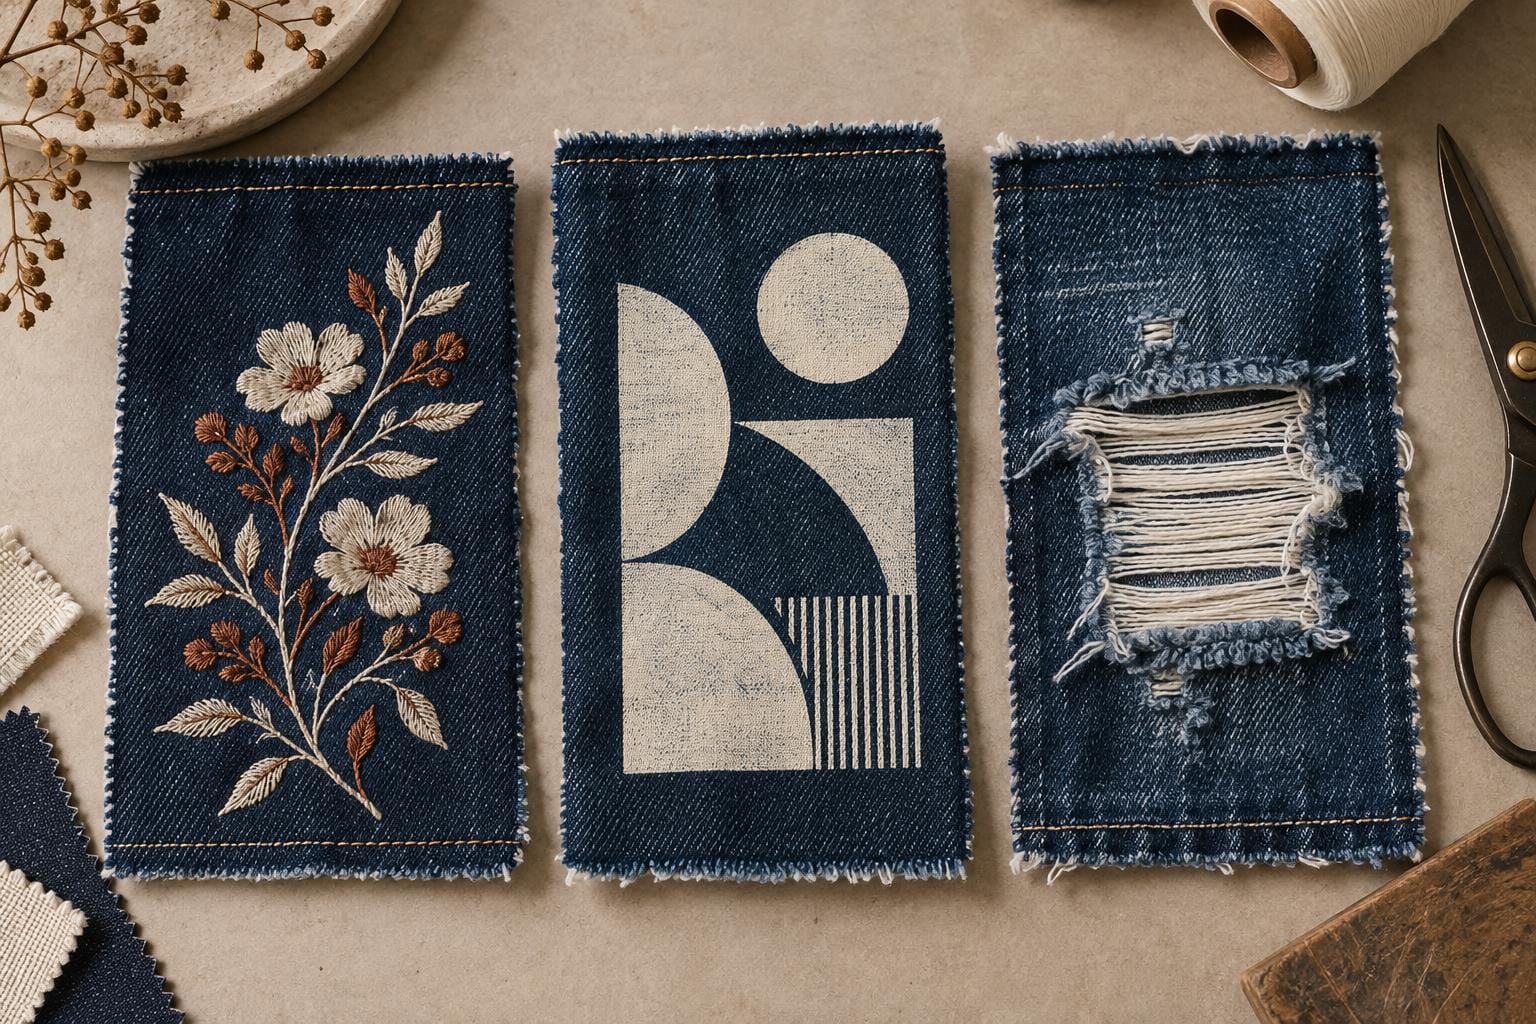
Custom Denim Guide: Choosing the Right Surface Finish
The Shift from Standard Washes to High-Impact Surface Customization
A good wash still matters. It gives denim its character before anyone notices the logo, the stitching, or the carefully worn pocket edge. But in a crowded market, an acid wash and a soft finish can only take a collection so far.
Surface details give customers something else to notice—and, ideally, remember. Chainstitch lettering might make a jacket feel like a vintage find. A raised print can turn a simple pair of jeans into the centerpiece of an outfit. Even a small frayed patch changes how a garment feels in the hand.
That is why many premium denim brands combine their denim wash processes with embroidery, screen printing, and selective distressing. The aim is not to put every technique on every garment. It is to choose details that make the design feel intentional.
Who This Guide Is For: Independent Streetwear Labels, Private Labels & Sourcing Managers
This guide is for independent streetwear founders, private label teams, and sourcing managers who need a design to survive the journey from a tech pack to a finished production run.
That journey can be surprisingly rough. An embroidered panel looks perfect before washing, then comes back puckered. A print lands beautifully on flat fabric but skips over a pocket seam. The sample works; the bulk order behaves differently.
Drawing on our operation’s 20-plus years of manufacturing experience, more than 10 production lines, and over 330 specialized garment machines, we explain the decisions behind those outcomes. The focus is practical: choose compatible processes, catch problems early, and make the approved sample repeatable.
Custom Denim Embroidery: Precision, Needle Tension & Vintage Effects
For heavyweight denim, decide on the wash sequence before finalizing the embroidery setup. Explore women’s embroidered denim jeans for garment placement ideas.
                  [ Heavy 12–16oz Twill ]
                            |
             +--------------+--------------+
             |                             |
      PRE-WASH EMBROIDERY            POST-WASH EMBROIDERY
      Softer vintage finish          Sharper definition
      Raw-edge effects               Better control of puff
             |                             |
             +--------------+--------------+
                            |
              [ Test Backing, Needle,
                Density, and Tension ]
                            |
              [ Approve the Finished,
                   Washed Sample ]
Flat vs. 3D Puff vs. Chainstitch: Choosing the Right Stitch for 12–16oz Denim
Heavy denim asks more of an embroidery machine than a lightweight knit. The needle has to pass through a dense twill, sometimes with several fabric layers underneath. Add a tightly packed design, and needle deflection, thread breaks, or an overly stiff finish can follow.
For flat embroidery, a stitch density roughly 10% to 15% lower than a comparable lightweight-knit program can be a useful trial setting. Treat it as a starting point, though. The actual fabric and artwork should decide the final program.
- Flat tatami and satin stitching: A dependable choice for clean logos and multicolor back-pocket artwork. A 40wt polyester thread is worth considering where the embroidery must tolerate industrial washing and abrasion.
- 3D puff embroidery: Typically uses 2–3mm EVA foam beneath satin stitches. On heavy denim, check needle heat, machine speed, foam compatibility, and thread wear during trials. Cooling may help where heat buildup becomes a problem.
- Chainstitch: Well suited to heritage lettering and vintage-inspired graphics. Its looped structure gives the design a different texture from a dense fill and can work beautifully with the drape of cotton selvedge denim.
There is also a design question here: how should the finished panel move? A large, dense logo may look excellent in a photograph while feeling like a badge sewn onto cardboard. Handle the sample, not just the artwork.
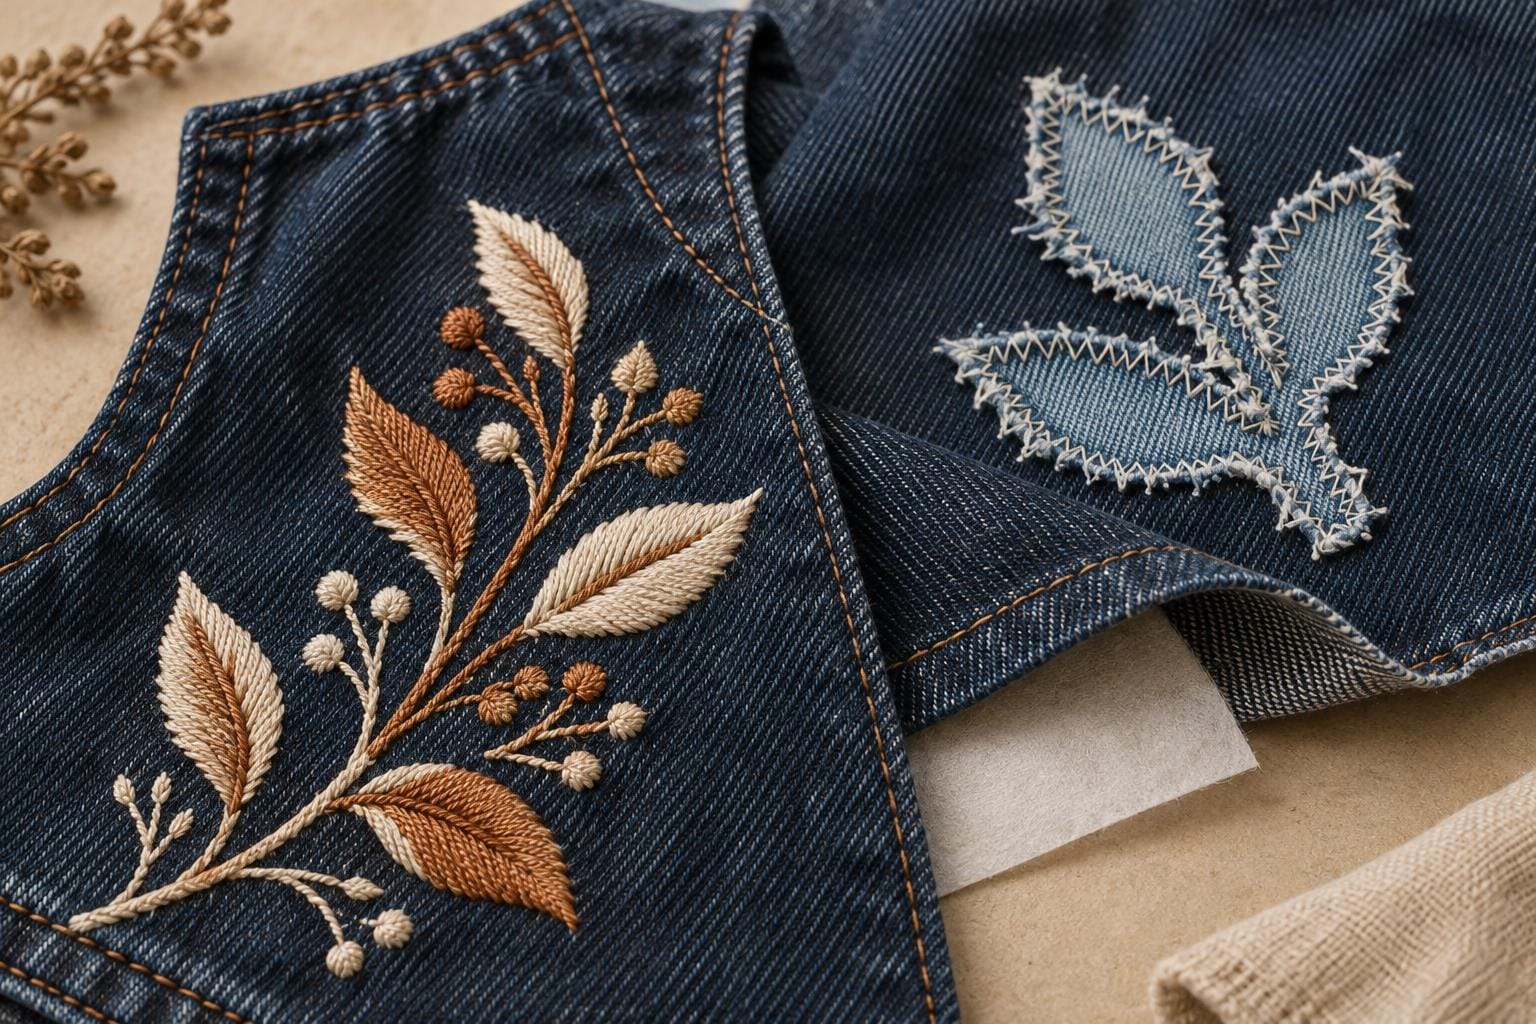
Distress Embroidery & Raw Frayed Appliqué Techniques
The best distressed appliqué looks relaxed. Getting it there takes planning.
One approach is to secure cut twill patches with an open zigzag or loose running stitch, leaving an exposed edge around the attachment line. Stone or enzyme washing then encourages that edge to fray.
Laser cutting may suit some patch materials, but the edge still needs testing; it does not produce the same fraying behavior on every fabric.
The important distinction is between a loose-looking edge and a loose patch. The first is a design choice. The second is a return waiting to happen. Leave room for the fringe to develop while keeping the anchoring stitches secure.
Factory Fixes for Puckering: Backing Stabilizers & Thread Tension on Twill Fabric
Puckering often comes from several small problems working together: dense stitches, excessive tension, poor hooping, or fabric movement along the twill.
Start with these three checks:
- Backing: For dense designs on heavy denim, cut-away stabilizer is a sensible starting point. Two layers of 2.5–3.0oz non-woven polyester backing may suit demanding applications, but test the weight and comfort. A small logo may need less support.
- Needle selection: Trial suitable needles around #90/14 to #100/16. The choice between a sharp point and a ballpoint should depend on the denim construction and any stretch content. Titanium-coated options may be useful for demanding runs.
- Thread tension: If the top thread is pulling the fabric inward, ease it gradually and inspect the stitch balance. Check hooping and density at the same time.
Judge the result after its intended wash. Before that, you are only seeing half the story.
Screen Printing on Denim: Inks, Curing & Texture Control
Plastisol vs. Water-Based vs. Discharge Inks on Indigo-Dyed Cotton
Printing on denim starts with the fabric, not the ink catalog.
Dark indigo affects color coverage. Surface texture changes how evenly ink sits. Existing finishes can influence adhesion and absorption. Two fabrics that look almost identical may produce noticeably different prints.
The main ink systems offer different tradeoffs:
| Ink System | Opacity on Dark Indigo | Hand-Feel & Texture | Wash Performance | Production Caveats |
|---|---|---|---|---|
| Plastisol | Usually strong with a suitable formulation and deposit | Can feel substantial or rubberized, especially in thick layers | Can be durable when correctly cured | Excessive heat can damage or discolor the garment; insufficient curing weakens the print |
| Water-Based | Varies; dark grounds may require an opaque system or underbase | Often softer, depending on formulation and coverage | Depends on the ink system and cure | Some systems need a compatible fixer or cross-linker |
| Discharge | Depends heavily on how the base dye responds | Can leave a very soft print | Requires testing on the actual fabric | Results can be unpredictable on sulfur-treated denim and blended fabrics |
Factory note: Do not assume a discharge ink will work because the garment is cotton. Test the actual denim dye lot with the intended discharge system before approving bulk printing. Sulfur treatments, dye combinations, and fiber blends can change the result.
A soft print is appealing. A reliably repeatable soft print is what makes it usable in production.
Printing Across Seams, Yokes, and Pockets: Common Pitfalls and Off-Contact Settings
A raised seam interrupts the relationship between the screen, ink, and garment. That is where pooling, blurred edges, and missed areas tend to appear.
If a graphic must cross a seam or yoke, build the print setup around that obstacle:
- Trial the off-contact distance. A 3–4mm setting may be a useful starting point, but screen tension and garment thickness matter.
- Support the garment properly. Custom platen cut-outs or suitable foam print beds can help accommodate raised areas.
- Test the squeegee. A 65/90/65 triple-durometer blade is one option to evaluate for an uneven surface.
Sometimes the cleanest solution is a small placement change. Moving a graphic slightly away from a bulky seam can save repeated press adjustments without changing the character of the design.
Achieving the Cracked Vintage Look: Controlled Ink Film Thickness and Heat Curing
A convincing cracked print needs controlled aging. Simply under-curing a normal ink is a poor shortcut: the result may peel or wash away instead of developing attractive cracks.
Purpose-made crack-effect formulations offer a more predictable route. Ink thickness, curing, stretching, and any later tumble treatment all affect the pattern.
A temperature such as 160°C may be relevant to a particular system, but it is not a universal flash-curing recipe. Follow the ink supplier’s requirements and verify the cure through the ink film.
Approve the graphic after the planned finishing process. A crack pattern that looks subtle before washing can become much more pronounced afterward.
Denim Distressing: Hand Abrasion, Grinding & Laser Technology
Traditional Manual Techniques: Grinding, Whisker Scraping, and Knee Slits
Hand distressing brings small variations that can make denim feel less uniform. See women’s ripped denim jeans for examples of distressing placement. The challenge is keeping that variation within an approved range.
- Whisker scraping: Operators can mount garments on inflated forms and work along natural crease patterns. Around 180-grit sandpaper is one possible trial choice, adjusted to the fabric and desired abrasion.
- Hem and pocket grinding: Abrasive tools wear down pocket scoops, hems, and fly edges. These details usually look more convincing when they follow places that would naturally receive wear.
- Knee slits: Carefully placed cuts establish the opening, while subsequent abrasion or washing develops the edge. Cutting direction and depth determine which yarns remain intact.
A useful design test is to ask where the wear would come from. Creases around the hip have an obvious explanation. A heavily abraded patch in an unlikely spot may need a stronger visual reason.
Laser Distressing: Repeatability, Resource Use & Fabric Strength
Laser distressing offers much tighter control over repeated patterns. Depending on the artwork and equipment, a machine can create effects quickly and reproduce whisker placement consistently across a run.
It can also reduce reliance on certain water-intensive finishing steps. That does not mean the entire garment becomes water-free; later washing may still be part of the process.
Nor does laser treatment automatically preserve strength. Excessive energy can weaken fibers. The settings need to suit the fabric weight, fiber blend, and intended effect.
Use digital repeatability to control the pattern, then test the finished garment to confirm that the fabric still performs as needed.
Warp-Only Fraying vs. Full Destruction: How to Retain Garment Structural Integrity
A distressed knee should keep its intended shape through normal wear. If the opening doubles in size immediately, the design has lost control of the damage.
For a frayed window with visible white threads, specify which yarns must remain:
- Cut the warp selectively: Remove or break the dark vertical warp yarns while preserving the lighter horizontal weft where that construction allows.
- Reinforce vulnerable areas: Stay tape, discreet edge stitching, or a lightweight jersey backing can help limit further tearing.
Placement matters as much as appearance. An opening at a high-stress point needs more support than a small decorative abrasion elsewhere.
The Production Sequence: What Happens Before & After the Wash House?
Process order changes the final appearance, the risk of damage, and the cost of a mistake.
A washed-down print may need to go on early. Crisp embroidery often benefits from going on later. Neither choice works in isolation: access to the panel, garment shrinkage, and the wash recipe all have a say.
The following is a planning framework, with the exact order adjusted during sampling:
                 [ RAW DENIM PANELS ]
                           |
         [ Selected Printing / Flat Embroidery ]
                           |
                  [ GARMENT ASSEMBLY ]
                           |
                 [ INDUSTRIAL WASHING ]
             Enzyme / Stone / Bleach, as specified
                           |
                [ POST-WASH FINISHING ]
        Selected Printing / Embroidery / Distressing
                           |
                [ 100% QUALITY INSPECTION ]
Laser work and hand abrasion may occur before or after washing, depending on the effect. A flowchart is useful; the approved sample remains the deciding reference.
Pre-Wash vs. Post-Wash Execution Matrix
- Print before washing: Useful when the graphic should age with the denim. Test whether the ink survives the intended abrasion while developing the right amount of wear.
- Print after washing: Gives better control over sharp lines and color on the finished shade. Access becomes harder once pockets, seams, and hardware are in place.
- Embroider before washing: Can create a softer, more integrated vintage finish. The risk is that fabric and thread respond differently to washing.
- Embroider after washing: Reduces uncertainty from the main shrinkage stage and helps preserve lettering detail. Good stabilization and tension control are still necessary.
For example, a faded thigh graphic and a crisp waistband logo may belong at different stages of the same production route. There is no need to force both through one sequence.
Managing Differential Shrinkage: Preventing Embroidery Distortion
Denim and embroidery thread do not necessarily shrink together.
Depending on the fabric and treatment, denim shrinkage may fall around 3% to 8%, with different results in the warp and weft directions. Polyester embroidery thread generally changes much less. That mismatch can make a previously flat design ripple after washing.
Test fabric from the intended production lot before finalizing the embroidery file. Record shrinkage in both directions, then decide whether to pre-wash, change the process order, or adjust the design and stitch program.
A measured 5% change can inform compensation trials. It should not become an automatic instruction to increase stitch density by 5%; dimensions, density, and tension affect the result in different ways.
Wash Fastness Testing: Ensuring Screen Prints Survive Heavy Laundering
A print needs to survive the wash it will actually receive.
Some enzyme recipes may operate around pH 4.5–6.0, and some processes may reach 60°C. Those conditions should come from the chosen recipe, rather than being applied to every denim style.
A practical approval plan can include:
- Production-representative wash trials: Test printed strike-offs through the intended process. Three consecutive 45-minute stone-wash cycles may serve as an additional stress test where appropriate.
- Rubbing and staining assessment: Use the applicable AATCC method and its specified assessment scale.
- A written acceptance grade: If Grade 4 is the agreed minimum, results below Grade 4 fail that requirement.
Also compare the visual effect with the approved sample. For a deliberately weathered print, some change is part of the design. Uncontrolled transfer or peeling is a different matter.
Combining Multiple Techniques: Cost Breakdown & Yield Management
Every extra process adds another opportunity for a defect—and more value to lose if the defect appears late.
The following figures are useful as planning scenarios, rather than fixed industry averages:
| Process Combination | Illustrative Scrap Allowance |
|---|---|
| Single technique | Around 2%–3% |
| Two techniques | Around 5%–7% |
| Printing, heavy washing, and complex embroidery | Around 9%–12% |
Use actual factory performance and pilot-run results to refine these allowances.
How Multiple Processes Affect Scrap Risk and Unit Cost
Consider a pair of jeans that has already been washed and embroidered. If the final print is misplaced, the loss includes all the work completed before it.
That is why a complex style can become expensive even when each individual process looks reasonably priced. Our custom denim production cost guide explains how to plan the wider manufacturing budget.
In the planning scenarios above, scrap rises from roughly 2%–3% for a simpler route to 9%–12% for a demanding combination. The increase is not inevitable, but it deserves a place in the costing discussion.
Allow for replacement panels where practical, and inspect between stages. Finding a problem before the next operation is usually cheaper than discovering it at packing. Use our jeans factory audit checklist to assess process control and inspection practices.
Tech Pack Essentials: Placement Callouts, Stitch Counts, and Seam Tolerances
A tech pack should answer the questions an operator would otherwise have to guess. Use our denim tech pack preparation guide to organize artwork, measurements and approval notes.
- Embroidery specifications: Record the stitch count, thread, backing, and relevant density requirements. “12,400 stitches, 40wt trilobal polyester, cut-away stabilizer” is more useful than “premium embroidery.”
- Placement references: Measure from clearly defined seams or finished features. For example, specify a position 5.0cm below the bottom of the waistband and identify the alignment line in a drawing.
- Clearance zones: A 2.5cm buffer from bulky rivets, belt loops, and heavy flat-felled seams can be a useful planning allowance. Confirm it against the actual equipment and design.
State whether each measurement applies before or after washing. Otherwise, two people can follow the same number and still produce different results.
Minimum Order Quantities (MOQs) & Unit Cost Drivers
Complex denim carries setup costs that do not shrink neatly with the order quantity.
- Digitizing and print setup: Embroidery programming and screen preparation add initial costs. Designs above 25,000 stitches also tend to require more machine time, although speed, trims, and color changes affect the total.
- Wash-load efficiency: Equipment in the 100–250kg capacity range needs an appropriate working load. Small batches can behave differently because the balance of garments, water, and friction changes.
- Minimum quantities: An MOQ of 300–500 units per wash recipe may make sense for some production setups. Actual requirements depend on the factory, fabric availability, color splits, and process complexity.
Ask what drives the minimum. That answer may reveal a useful adjustment—such as sharing a wash recipe across styles—that makes the collection easier to produce.
Factory Case Study: High-Density Embroidery on 14oz Washed Streetwear Denim
The client was a growing independent streetwear brand based in Los Angeles. Its design combined a 35,000-stitch multicolor back-panel embroidery with an aggressive vintage acid wash.
The early overseas prototypes had three recurring problems: puckered fabric, broken threads, and graphics that shifted after washing.
The design was achievable. The production sequence needed attention.
Our team, supported by more than 20 years of manufacturing experience and a research and development group of over 15 people, started with shrinkage testing. The 14oz ring-spun denim showed 5.5% vertical shrinkage—enough to distort a dense embroidered panel.
We moved the main shrinkage stage ahead of embroidery by pre-washing the panels through our recovery-equipped washing system. The embroidery setup then used two layers of 3.0oz cut-away stabilizer and #100/16 titanium-coated ballpoint needles on multi-head Tajima machines, selected for this application.
The lesson was straightforward: more backing alone would not solve fabric movement that had not yet happened. Changing the sequence addressed the source of the distortion.
Sample development took 13 days. The 1,200-piece bulk order ran through our facility, which operates more than 10 production lines, and recorded a final defect rate below 0.8%. Production finished within the then-standard 15–25-day window, with full pre-shipment inspection.
This completed order reflects a historical timeline. Our current standard is 10–20 days for sampling and 25–35 days for bulk production.
Conclusion: Building a Scalable Custom Denim Collection
A successful custom denim collection needs details that look good and a production route that keeps them looking that way.
The practical work happens before bulk cutting: measure shrinkage, test the ink on the actual dye lot, choose the embroidery setup, and agree on the wash sequence. These decisions are less visible than the finished graphic, but they determine whether the factory can reproduce it consistently.
Our Jiangmen, Guangdong facility covers more than 7,000 square meters, with over 330 garment machines and a workforce of more than 150 skilled employees. Annual output exceeds 600,000 pieces.
Energy-saving lighting and a boiler steam exhaust recovery system support efforts to improve resource efficiency. These are specific measures that can be discussed alongside production capacity, quality records, and the requirements of each order.
Before approving bulk production, look at the complete garment once more. Check the inside. Stretch the distressed area gently. Feel the embroidery backing. A photograph cannot tell you everything.
Final Pre-Production Sampling Checklist
- Measure fabric shrinkage in both directions before finalizing embroidery files.
- Test discharge compatibility on the intended indigo dye lot.
- Confirm decorative placement and the planned 2.5cm clearance around bulky seams and hardware.
- Inspect needle perforations and distressed edges after washing for signs of further tearing.
- Confirm that the chosen cut-away backing provides adequate support without unnecessary bulk.
Frequently Asked Questions (FAQ)
Q1: How quickly can our brand receive production quotes and custom denim samples?
Our stated response time is within 30 minutes for inquiries. With the required product specifications available, we provide a detailed quotation within 3 hours.
Complete sample development takes 10–20 days. To help the team assess the design accurately, include the tech pack, fabric weight, wash reference, artwork, and planned order quantity with your inquiry.
Q2: What is the typical bulk production lead time for multi-process custom denim?
Our standard bulk production window is 25–35 days for custom OEM/ODM denim involving washing, printing, and embroidery.
Confirm the schedule against the approved sample and final process requirements so the order has a clear production timeline.
Q3: How do you handle quality control and potential factory defects during bulk runs?
Every product receives a full inspection before packing and dispatch. We also provide relevant international testing certificates and inspection reports before shipment.
If a defective unit reaches retail distribution, we provide a direct replacement under the applicable order terms. Sample development costs are refunded once the agreed bulk-order volume milestones are met.
Ready to develop your custom denim collection? Contact our denim development team with your tech pack, artwork, wash reference and target quantity to discuss sampling and production requirements.

Recent Comments