
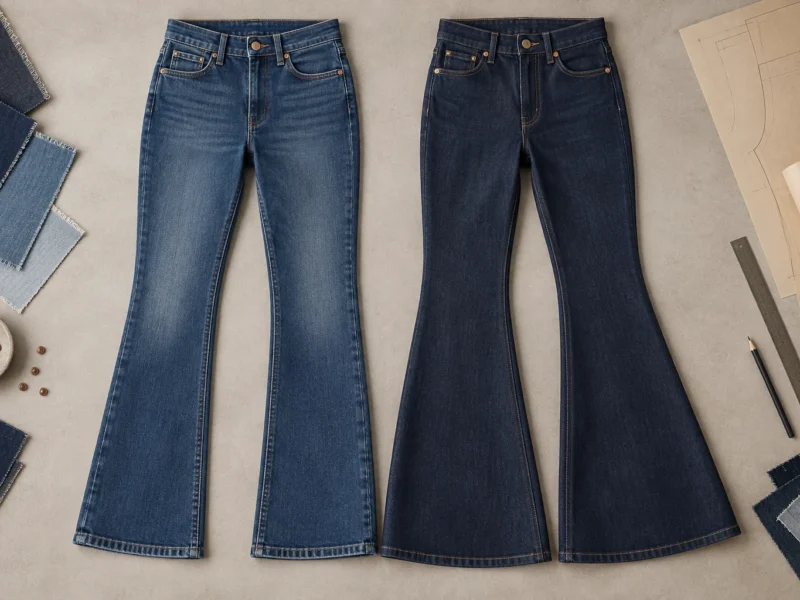
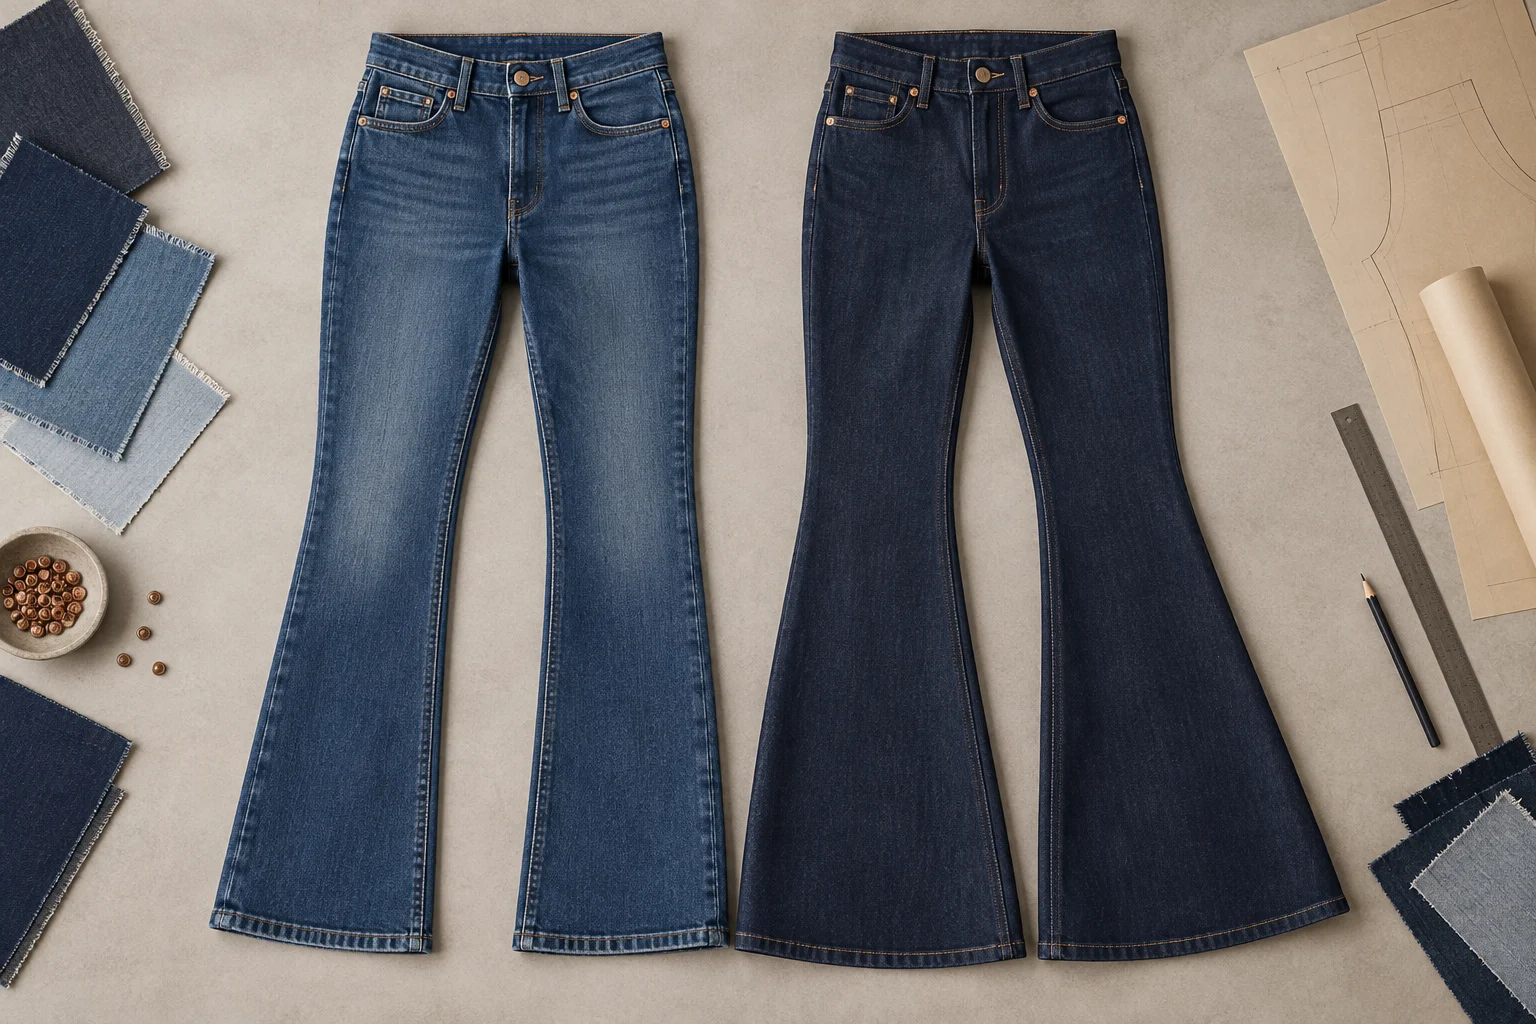
Custom flare and bootcut denim for women requires coordinated decisions on knee placement, leg opening, waistband fit, fabric recovery and wash shrinkage. This manufacturing guide explains how brands can turn those decisions into a clear tech pack, a wearable sample and repeatable bulk production.
A flare jean can look right on a sketch and still feel wrong the moment someone tries it on. Perhaps the knee sits too low. Perhaps the waistband pulls away when the wearer sits down. Or the hem, which looked beautifully balanced before washing, starts drifting around the ankle.
Those details make flare and bootcut denim demanding to manufacture. The fit has to work through the waist, seat, and thigh, then open into a deliberate curve below the knee. Small errors in grading or fabric alignment have a habit of showing up in very visible places.
At Kaiping Lianwang Garment Co., LTD, we approach development with those details in mind. Our factory in Jiangmen, Guangdong, China, brings together 20+ years of manufacturing experience, a 7,000-square-meter facility, 330+ garment machines, and 10+ production lines. Annual output exceeds 600,000 pieces, supported by a dedicated 15+ member R&D team.
For the brands we serve across Europe, the United States, and Australia, the aim is straightforward: turn a promising tech pack into denim that fits, washes, and scales consistently.
In this guide
- Flare vs. Bootcut: Silhouette Differences
- Waistband, Hip and Seat Fit
- Fabric Selection, Stretch and Recovery
- Seam Twist, Hem Quality and Wash Shrinkage
- Tech Pack Measurements and Size Grading
- OEM/ODM: From Sample to Bulk Production
- Frequently Asked Questions
Custom Flare and Bootcut Denim: Silhouette Differences
“Make it a little more flared” sounds clear enough in a design meeting. On a cutting table, it leaves quite a lot unanswered.
Where should the leg begin to widen? How close should it sit at the knee? How much sweep does the hem need? Defining those points early gives designers and pattern-makers the same silhouette to work toward.
| Sample-size reference | Bootcut | Flare |
|---|---|---|
| Knee circumference | Approximately 14–15″ | Approximately 13.5–14.5″ |
| Hem opening circumference | 16–19″ | 20–24″+ |
| Leg shape | A restrained opening toward the lower calf | A more pronounced opening at or just above the knee |
These measurements are development references. The finished shape still needs to be assessed in the chosen fabric, wash, and size. Compare the silhouette options in our women’s bootcut denim jeans collection when preparing your design brief.
Knee-to-Hem Proportions: Establishing the Exact Leg Opening Ratios (Bootcut 16–19″ vs. Flare 20–24″+)
A bootcut follows the thigh, sits fairly close around the knee, and opens gently toward the hem. For a sample size 28, our reference measurements are a 27–28″ waist, a 14–15″ knee, and a 16–19″ leg opening.
A flare makes a more noticeable change of direction. The opening begins at or just above the knee and grows to 20–24″ or wider. A full bell-bottom can reach 26″+.
The relationship between knee and hem matters as much as either number on its own. In this development framework, a knee-to-hem difference below roughly 2.5″ is a warning sign: after washing, the intended bootcut may look closer to a straight leg.
That is worth catching at the sample stage. A style name cannot do the work of a pattern.
The Knee Break Anchor Point: Why Vertical Knee Placement Dictates Perceived Inseam Length
The knee break anchor point is where the fitted upper leg starts opening into the flare. Move it slightly, and the whole leg can appear longer or shorter—even when the inseam stays the same.
On an average 32″ inseam, a starting knee-line reference is roughly 12–13″ below the crotch point. We then refine that position during fitting.
For the elongated line described here, we develop the break approximately 1.0–1.5″ above the anatomical knee midpoint. This helps the lower leg appear longer and gives the opening room to fall over a boot shaft.
The mirror still gets a vote. A placement that works beautifully on one fit block may need adjustment on another.
Silhouette Balance Across Sizes: Preventing the “Straight Leg Illusion” in Plus-Size Grading
A flare that looks balanced in the sample size can lose its shape as the size range expands. This often happens when thigh and knee measurements grow faster than the hem opening.
The larger garment may meet its individual measurements, yet the visual contrast between knee and hem has faded.
To help preserve the flare from US 0 to US 24+, our grading approach uses these starting controls:
- Limit knee-girth increases to no more than 0.5″ per size jump.
- Increase hem sweep more generously, by up to 0.75–1.0″ per size jump.
- Check a minimum hem-to-knee ratio of 1.45:1, using the same measurement convention for both.
Those rules need to work together. Applying a grade increment mechanically is not enough; the ratio and the appearance should be checked across the actual size run.
Pattern Making for a Better Waist and Hip Fit
A waistband can look perfectly acceptable while someone stands still. Then they sit down, and a gap appears at the lower back.
That is why a convincing fit starts with movement. Waistband shape, back rise, and seat curve all contribute to whether the jean stays comfortably in place.
Contour Waistband vs. Straight Cut: Mitigating the Lower Back Waistband Gap
A straight waistband has its uses, particularly on low-slung or boxier fits. On a more pronounced hip-to-waist curve, however, it can struggle to follow the body.
We use a curved two-piece or three-piece contour waistband for these styles. Its arc follows the inward shape of the lower back, helping the upper edge sit closer without simply tightening the entire waist.
Stabilized chain stitching along the lower waistband edge helps hold that shape through assembly and wear.
The distinction is practical. A close-fitting waistband should feel secure when the wearer sits, bends, or reaches—not as though someone solved the gap by taking away all the breathing room.
Back Rise Pitch & Seat Curve: Distributing Stretch Fabric Tension for Natural Butt Lift & Hip Hold
The back rise determines how the denim travels over the seat and meets the waistband. If that balance is off, the wearer may find herself pulling the jeans up throughout the day.
Our development approach brings three elements together:
- Back rise pitch: A steeper draft, typically 18°–24° from the vertical baseline, provides a starting point for the intended fit.
- Seat curve: Adjusting the depth and distribution of the J-shaped curve beneath the pelvis helps manage tension through the seat.
- Fit outcome: The aim is a supported, lifted appearance, less crotch bunching, and a secure hold across the hips.
These adjustments should be evaluated as a set. Changing the seat curve without checking the rise and fabric stretch can simply move the fit problem somewhere else.
Inseam Segmentation for Footwear Realities: Accounting for Flat-Sole Drop vs. Heel Clearance
Flared jeans and footwear are a package deal. An inseam that falls neatly over a heel may spend the whole day sweeping the pavement when worn with sneakers.
We therefore develop separate inseam options:
- Flat-sole inseams, 30–31″: A subtle 0.25″ rise at the front/outseam area of the hem helps the opening fall over sneakers.
- Heel-clearance inseams, 33–35″: A slight high-low hem arc, approximately 0.5″ longer at the back, supports a longer visual line.
Actual floor clearance must be checked with the intended shoe. The goal is a clean drape, with enough length to finish the silhouette and enough clearance to protect the hem.
Choosing Denim Fabric: Stretch, Recovery and Drape
The pattern establishes the shape. The fabric decides how that shape behaves.
A soft denim may feel lovely in the hand yet collapse around the ankle. A heavier construction can hold a broad bell beautifully, but it may feel too firm for a close-fitting stretch style. Weight, recovery, and drape need to be considered together.
| Denim construction | Weight (oz/yd²) | Recovery reference | Intended application |
|---|---|---|---|
| 100% rigid cotton | 12.5–14.0 | Non-stretch; elastic recovery not applicable | Vintage 1970s-style wide bell-bottoms |
| Cotton / elastane | 10.5–11.5 | 88–91% | Entry-level comfort bootcut |
| Dual-core T400 + Lycra | 11.0–12.5 | Above 96%; growth below 4% | Premium sculpting flare for curvier fits |
| Cotton / Modal / T400 | 10.0–11.5 | Above 95% | Soft, draping bootcut |
These are fabric-selection references; performance should be confirmed under the agreed testing conditions.
Stretch Factor & Elastic Recovery (ASTM D3107): Why <4% Fabric Growth Prevents “Sagging Knees”
The first stretch is easy to notice. Recovery takes longer to reveal itself.
A jean may feel comfortably flexible during a quick fitting, then develop loose pockets of fabric at the knees after wear. In a flare, that matters because the knee is the narrow point that gives the lower opening its definition.
Our R&D team uses ASTM D3107 as the reference standard for evaluating stretch-denim behavior. For the sculpting stretch program described here, the development targets are:
- Fabric stretch: 25–35% controlled elasticity.
- Fabric growth: Below 4%, with a defined 30-minute assessment in the agreed test protocol.
- Elastic recovery: Above 96% under the specified assessment conditions.
The loading, extension, resting period, and calculation method should be recorded clearly so the results are comparable. Repeated-wash checks are also needed to assess whether that performance lasts.
A good knee fit should survive more than the walk from the fitting room to the mirror.
Dual-Core & Multi-Fiber Blends: Leveraging T400, Lycra, and Modal for Weight & Structural Drape
Dual-core constructions give us a useful way to balance flexibility and shape retention.
Lycra supplies the initial stretch, while T400, an EME fiber, contributes recovery. A cotton sheath provides the familiar denim surface; incorporating 10–15% Modal can soften the handfeel and improve the way the fabric falls.
For this type of development, we target a finished weight of 10.5–12.5 oz/yd². That range provides a starting balance between a comfortable upper fit and enough substance to support the hem opening.
The finished wash sample is the deciding piece. Two fabrics with similar compositions and weights can still drape differently.
Rigid vs. Comfort Stretch: Balancing Vintage Authentic Character with Contouring Performance
Rigid cotton denim brings much of what people love about vintage jeans: visible twill, a substantial feel, and wash variation with character.
It also asks the wearer to accept a firmer fit.
For brands seeking a vintage look with more everyday give, we use a 98% cotton, 2% elastane comfort-stretch construction with a ring-spun warp. The development target is 15–20% functional stretch, while retaining clear twill lines and defined abrasion effects.
This is a different brief from the higher-stretch sculpting program above. A relaxed vintage bootcut and a close-fitting curvy flare do not need the same fabric behavior simply because both have wider hems.
Production Controls: Seam Twist, Hems and Wash Shrinkage
Once the fit is approved, the challenge becomes repetition. The same leg shape has to survive cutting, sewing, washing, and finishing across the production run.
Flared panels make small inconsistencies easy to spot. A wandering seam or rippled hem can interrupt an otherwise clean silhouette.
Eliminating Seam Twist (Torquing): Balancing Left-Hand vs. Right-Hand Twill & Pattern Offsetting on Curved Outseams
Denim can release residual tension during wet processing, causing a seam to rotate around the leg. On a flare, the broad opening makes that movement especially visible.
We assess the fabric’s left-hand or right-hand twill direction, its wash behavior, and the shape of the curved panels before setting the correction. Flared panels introduce additional complexity because yarn direction and tension interact with the widening leg shape.
Where sample results call for it, our pattern-makers apply a 0.5–0.75″ counter-directional pattern offset at the hem. The correction is intended to let the outseam settle along the side of the leg after washing.
The offset should follow the observed twist. Twill direction is a useful clue, but the washed sample shows what actually needs correcting.
Preventing Hem Waving & Ruffling: Bottom Hem Tension, Stitch Densities (SPI), and Heavy Thread Calibration
A flare hem follows a curve. Feeding it through a folder as though it were a straight edge can stretch or crowd the fabric, leaving a rippled finish.
We control that operation through three settings:
- Fabric feeding: Bottom-hem chain-stitch machines use synchronized puller feeds to keep the layers moving evenly.
- Stitch density: Our starting specification is 7–8 stitches per inch (SPI), checked against the fabric and wash. Excessive density can encourage puckering; insufficient density can leave the hem poorly secured.
- Thread and tension: Tex 80–105 poly-core cotton thread on the needle is paired with balanced looper tension to support a flat hem with the intended roping character.
This is one of those details buyers may never name, but they notice the result. A smooth hem makes the entire leg look more finished.
Wash Shrinkage Calibration: Managing Differential Shrinkage Rates Across Warp/Weft in High-Distortion Wet Processing
A cutting pattern needs to anticipate the wash.
Enzyme treatments and stonewashing can change garment dimensions, while dry processes such as hand sanding contribute to the final appearance. The complete finishing route therefore needs to be considered before bulk cutting. Review our denim wash options when defining the target shade, handfeel and finishing effects.
Our laboratory checks 50 × 50 cm fabric swatches across three production wash cycles. Reference shrinkage ranges are 3–5% in the warp and 5–8% in the weft, although the measured results for the selected fabric take priority.
Uneven shrinkage can alter both the knee width and the opening below it. We feed the results into our CAD pattern system and adjust panel dimensions before preparing bulk markers.
That preparation is less dramatic than correcting a finished batch—and considerably more useful.
Tech Pack Measurements and Size Grading
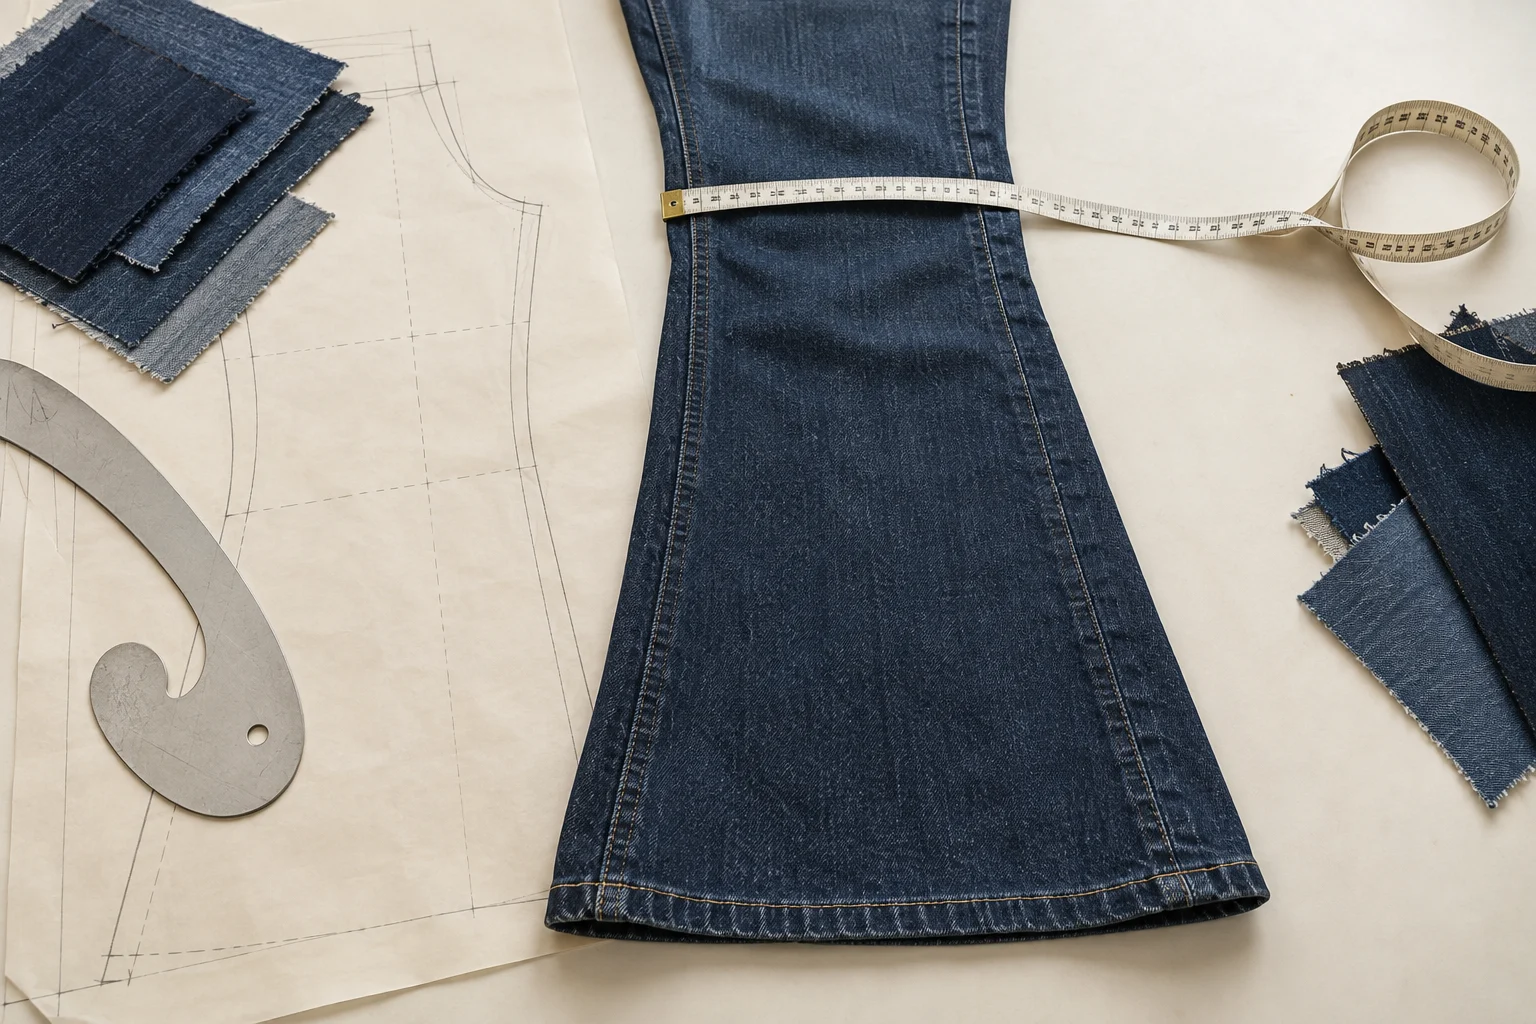
A thorough tech pack saves time because it removes guesswork. Follow our guide on how to prepare a denim tech pack to organize your measurements, construction notes and approval references.
For flares, waist, hip, and inseam measurements only describe part of the garment. The factory also needs to know where the knee sits, how narrow it should be, and how the hem should curve.
The example below uses full circumferences for girth and sweep measurements. If your team measures garments flat, state that convention explicitly.
| Critical measurement point (POM) | Post-wash tolerance | Sample specification, size 28 | Grading reference |
|---|---|---|---|
| Waistband horizontal sweep | ±0.50″ | 28.0″ | +1.0″ per size |
| Low hip, 8″ below waist | ±0.50″ | 37.5″ | +1.0″ per size |
| Mid-thigh girth, 2″ below crotch | ±0.25″ | 20.5″ | +0.5″ per size |
| Knee placement drop from crotch | ±0.25″ | 12.5″ | +0.125″ per size |
| Knee girth circumference | ±0.25″ | 14.5″ | +0.375″ per size |
| Hem opening sweep, flare | ±0.50″ | 22.0″ | +0.75″ per size |
| Inseam length | ±0.50″ | 32.0″ | By inseam tier |
The grade rules are starting references. They should be reviewed against the intended size intervals and the silhouette checks described earlier.
Critical Measurement Spec Points: Beyond Waist/Hip (Knee Position, Mid-Thigh Girth, Hem Flare Arc)
Four additional measurements make a flare tech pack much easier to interpret:
- Vertical knee drop: The distance from the crotch point to the narrowest knee line, measured along the specified inseam reference.
- Knee girth: The circumference at that knee anchor point.
- Mid-thigh girth: The measurement 2″ below the crotch fork, used to control the fitted upper leg.
- Hem flare arc: The depth and shape of the bottom curve, including how the front and back sections align.
A sketch beside the measurement table helps. “Knee” can mean slightly different positions to different teams; a marked point of measurement gives everyone the same reference.
Proportional Inseam Grading: Maintaining Consistent Flare Trajectory Across Petite, Regular, and Tall Runs
Imagine converting a 32″ inseam flare into a 28″ petite version by removing four inches from the bottom. The length is now correct, but much of the widest section has disappeared. The knee break has stayed in its original position, too.
The result may look like a shortened version of the wrong silhouette.
For petite inseams of 28–30″ and tall inseams of 34–36″, our starting rule is to move the knee break 0.5″ for every 2″ change in inseam. We then redraw and assess the lower-leg curve.
This keeps length development connected to proportion. Petite and tall fits need their own balanced leg lines.
Tolerance Thresholds: Controlling Garment Variance to Within ±0.5″ Post-Wash
The measurements that matter to the customer are the finished ones.
We apply post-wash tolerances of ±0.5″ at the waist and hip and ±0.25″ at the knee and thigh. Garments outside those limits are pulled during end-of-line inspection.
The tighter controls around the knee and thigh reflect their role in the silhouette. A small change at the narrowest part of a flare can have a surprisingly large effect on how the whole leg reads. Our jeans factory audit guide provides a broader checklist for evaluating production and quality controls.
Custom Flare and Bootcut Denim: OEM/ODM Workflow
Custom development works best when each stage answers a clear question: Is the brief complete? Does the sample fit? Can the approved result be repeated in production?
Our workflow follows that sequence: For labels planning branding and packaging alongside fit development, see our private label denim manufacturing services.
| Stage | Timing or checkpoint |
|---|---|
| Initial inquiry response | Within 30 minutes |
| Quotation and specification feedback | Within 3 hours |
| R&D sample development | Within 13 days |
| Fit verification | Measurements, movement, and footwear checks |
| Bulk production | 15–25 days after sample approval |
| Final quality control | 100% pre-shipment inspection, with AQL 2.5 as a stated quality reference |
| Defect resolution | Direct replacement of damaged units |
Proto-Sample Verification: Evaluating Static Tape Measurements vs. Live Dynamic Fit Tests
Once we receive the inquiry and tech pack, we provide detailed quotations within 3 hours. Our 15+ member R&D team develops proto-samples within 13 days.
Measurements provide the first check. Movement provides the next.
During live fitting, we use three practical tests:
- Squat and sit: Check whether the back waistband stays close to the body and whether the rise remains comfortable.
- Walking stride: Watch the outseam for rotation and assess how the fitted knee behaves in motion.
- Drape over footwear: Check whether both hems open evenly without catching or bunching.
A sample can meet its measurement chart and still need work. That is precisely why fitting should include more than standing still. Include trim approvals in the same review using our guide to custom denim buttons, rivets, patches and zippers.
Wet & Dry Laundry Duplication: Ensuring Consistent Hand-Scraping Whisker Placement Across Curvature
Whiskers and knee highlights need to follow the garment’s shape. When an abrasion effect sits too low or crosses the leg awkwardly, it can distract from the fit.
Our laundry team uses laser-aligned templates over contoured, inflated leg forms to position hand-sanded whiskers, scraping, and highlights consistently across production.
The finishing setup also includes energy-saving lighting and boiler steam recovery systems. These measures support lower energy use and more considered management of water and steam during processing.
Visual consistency and process efficiency both depend on controlling the work at this stage.
Final B2B Quality Control: Checkpoints for Hem Flatness, Symmetry, and Packaging to Eliminate Transit Creases
Before packing, our quality team inspects each garment individually, paying particular attention to the details that define a flare:
- Hem flatness and balance: Jeans hang on inspection stands so the left and right openings can be compared.
- Seam performance: Chain stitching along outseams and waistbands is checked for integrity under tension and recovery.
- Packaging: Wide legs are folded carefully with protective poly-layering to reduce transit creasing.
Our quality program includes 100% pre-shipment inspection and an AQL 2.5 reference for applicable acceptance checks. If damaged units reach the buyer, we provide direct replacements.
| Lianwang Garment: OEM / ODM at a glance | Details |
|---|---|
| Experience | 20+ years in denim manufacturing |
| Facility | 7,000 m², 330+ garment machines, 10+ production lines |
| Team | 150+ production workers and 15+ specialized R&D technicians |
| Annual capacity | 600,000+ finished garments |
| Response times | Inquiry reply within 30 minutes; quotation and specifications within 3 hours |
| Development and production | Samples within 13 days; bulk production in 15–25 days |
| Quality support | 100% pre-shipment inspection; direct replacement of damaged items |
| Export markets | United States, Europe, and Australia |
Custom Flare and Bootcut Denim FAQs
1. What is the minimum order quantity (MOQ) for custom flare denim manufacturing?
Our baseline production run starts at approximately 300–500 pieces per wash style.
Sample runs are available for custom development. Sample costs are refunded once the order meets the required volume; the applicable quantity should be confirmed in the quotation.
2. How fast can you turnaround proto-samples from tech packs?
We respond to inquiries within 30 minutes and provide a formal quotation within 3 hours. Custom sample development is completed within 13 days.
A clearly marked tech pack helps us use that time effectively, especially when the style includes multiple inseams, a specific contour fit, or detailed wash placement.
3. What is the average bulk production lead time?
Bulk production takes 15–25 days after sample sign-off.
For seasonal programs, build that production window into your schedule alongside development, approvals, and shipping. It gives the rest of the launch plan something concrete to work around.
4. How do you resolve outseam twist on high-stretch flares?
We examine the fabric’s twill direction and its behavior after washing, then adjust the CAD pattern where needed.
A typical correction uses a 0.5–0.75″ counter-rotational offset. We verify the result on the washed sample so the seam can settle along the intended side line.
5. What if defective units pass through during bulk shipping?
Every garment is inspected before packing. If defective or damaged units still reach your warehouse, we replace the affected items directly.
Bring your tech pack, target fit, and wash direction to Kaiping Lianwang Garment Co., LTD. Whether you are developing a subtle bootcut or a wide vintage flare, our engineering team can help work through the details—from knee placement to the finished hem—and provide technical feedback and a quotation within 3 hours.
Ready to develop your collection? Send your flare or bootcut denim brief to Lianwang Garment with your size range, order quantity, fabric preference and wash references. Ask the team to confirm the MOQ, sample terms and production schedule for your specific program.

Recent Comments