
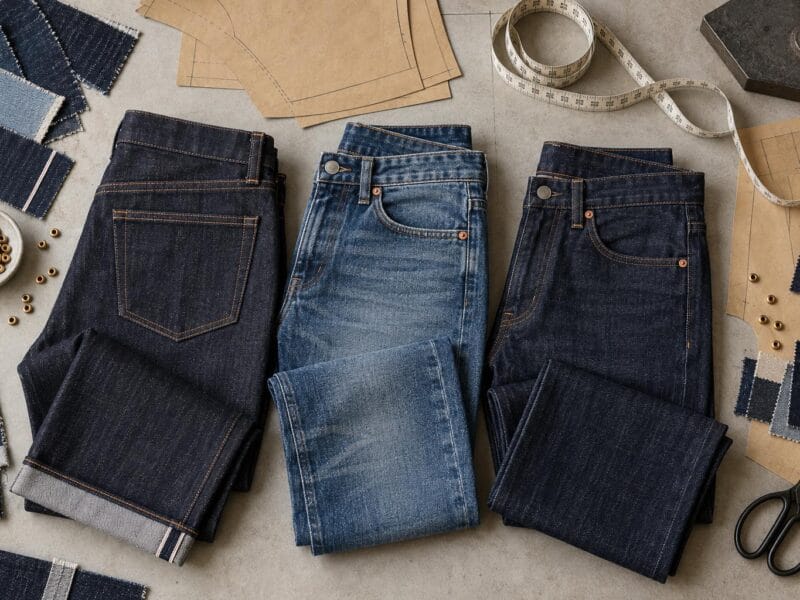
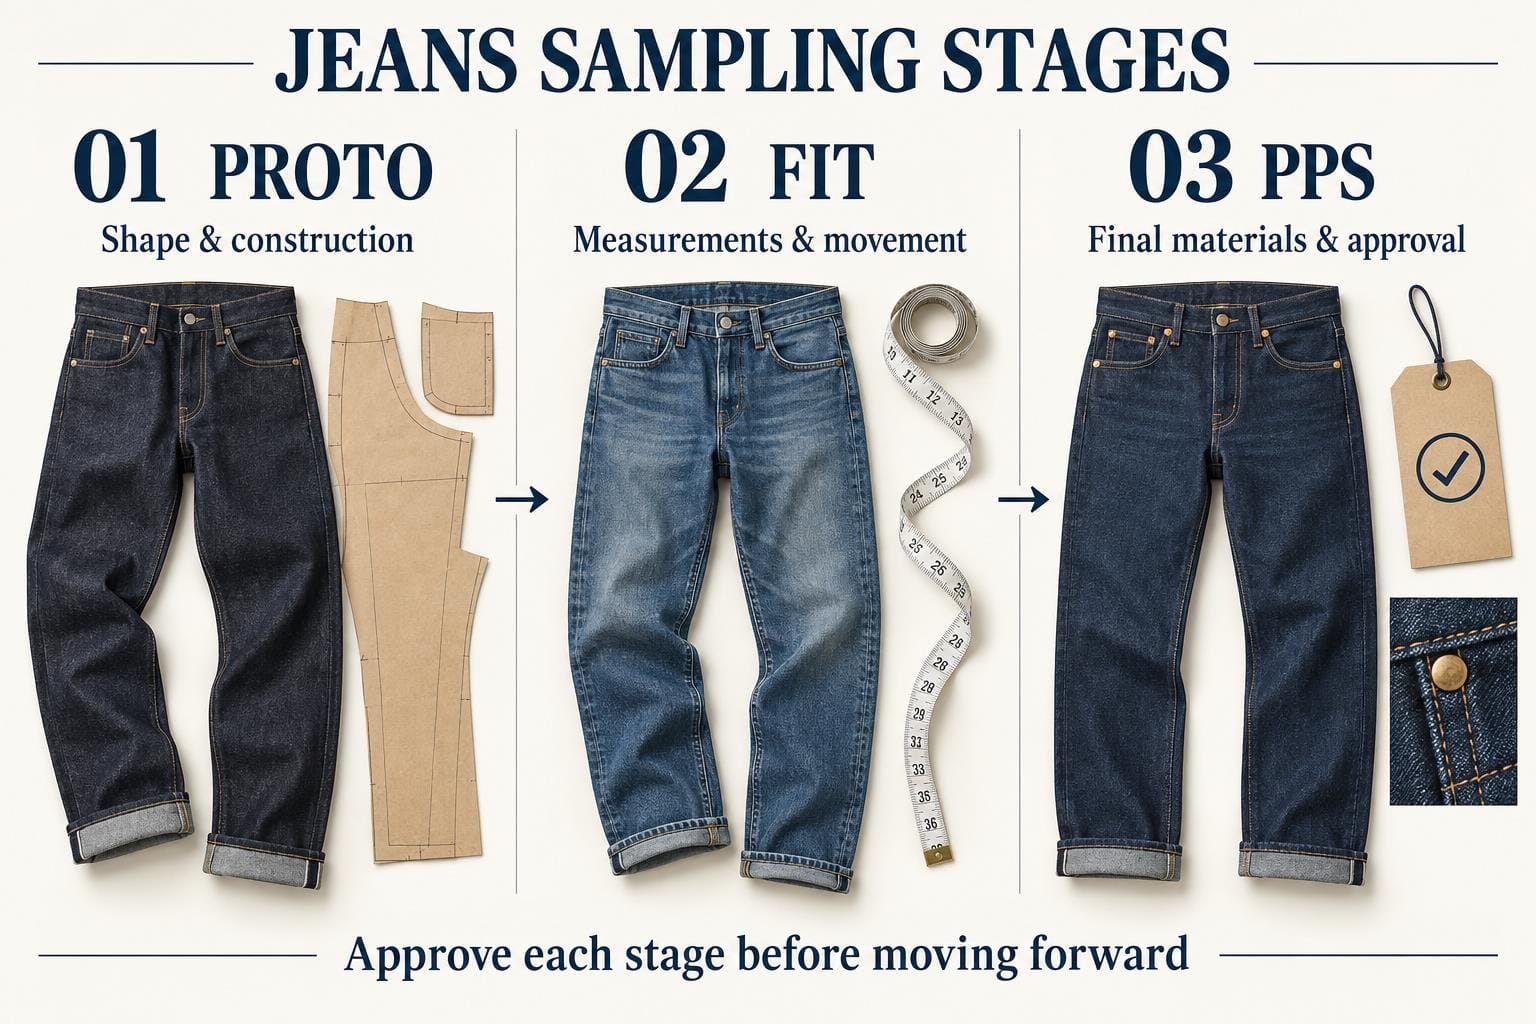
This jeans sampling guide explains the three approval stages before bulk production: Proto confirms the design and silhouette, Fit checks measurements and movement in the intended fabric and finish, and the pre-production sample (PPS) confirms final materials, wash, and construction. Use each stage to resolve specific issues before approving the next.
A pair of jeans can look right on paper and still feel wrong the moment someone sits down. The waistband gaps. The fly bunches. A side seam wanders toward the shin after washing.
That is why denim sampling deserves more than a quick visual check.
For DTC founders, sourcing managers, and product developers, the challenge is keeping the pattern, fabric, wash, and construction working together. Change one, and the others may need adjusting. Miss that connection early, and the problem can follow you into thousands of finished garments—along with unexpected costs and a delayed launch.
At Kaiping Lianwang Garment Co., LTD, based in Jiangmen, Guangdong, our denim manufacturing operation draws on more than 20 years of experience. Our 7,000+ square-meter facility has an annual capacity exceeding 600,000 pieces, supported by over 330 specialized garment machines and a sample development team of more than 15 people. We produce denim collections for markets across Europe, the United States, and Australia.
This guide explains what to check at the three main sampling stages: Proto, Fit, and Pre-Production Sample, or PPS. Each answers a different question. Does the design work? Does it fit after washing? Can the factory reproduce it consistently?
Getting those answers in that order makes development much easier to manage.
In this guide: Process overview · Proto sample · Fit sample · PPS approval · Costs and timeline · FAQ
Jeans Sampling Guide: Process Overview
With many basic cut-and-sew garments, the fabric on the cutting table gives you a fairly good idea of the finished product. Denim leaves more room for surprises.
After sewing, jeans may go through abrasion, washing, bleaching, tinting, and drying. Those processes affect more than color. They can change dimensions, softness, seam appearance, and the way the garment hangs.
The sampling process needs to account for that transformation:
| Stage | Main question | Fabric and production requirements |
|---|---|---|
| Tech Pack | Is the design clearly defined? | Drawings, measurements, construction details, and wash references |
| Proto Sample | Does the silhouette work? | Suitable stock denim with comparable weight and stretch |
| Fit Sample | Does the garment fit after the intended wash? | Actual production fabric, washed and dried using the target process |
| PPS | Can production reproduce the approved result? | Final fabric batch, trims, wash, and production construction methods |
| Bulk Sign-Off | Is everything ready for release? | Approved sample, specifications, and documented quality requirements |
The Double-Variable Challenge: Pattern Drafting Meets Garment Washing
Denim development involves two moving parts: the shape of the pattern and what happens to that shape during finishing.
Stone washing with pumice, cellulase enzyme treatments, ozone processes, and their associated washing and drying steps affect denim differently. Cotton yarns may contract or relax, while stretch blends bring their own behavior into the mix.
The pattern therefore needs enough allowance for the tested shrinkage of the chosen fabric and finish. Lengthwise shrinkage is rarely identical to widthwise shrinkage. Depending on the material and process, development teams may encounter shrinkage figures ranging from around 3% to 18%; that range is a reason to test, not a number to apply automatically.
Here is an illustrative comparison:
| Point of Measure (POM) | Before-Wash Measurement* | Finished Target | Approximate Reduction |
|---|---|---|---|
| Inseam length | 34.50″ | 32.00″ | 7.2% |
| Upper thigh width | 12.85″ | 12.00″ | 6.6% |
| Waistband measured flat | 16.60″ | 16.00″ | 3.6% |
These figures illustrate shrinkage compensation. Actual cutting patterns also need the appropriate seam and construction allowances.
Imagine approving a 32-inch inseam before washing simply because the tape measure says “32.” If the process then takes out more than two inches, the finished jeans have effectively become a different product.
Washing also brings out seam highlights. Raised areas around seam allowances, pocket edges, and double-needle chainstitching receive more friction, creating the light-and-dark effect often called “bone line” abrasion .
An unwashed sample can tell you plenty about construction and basic proportions. It cannot give you the final answer on washed fit and drape.
The Costly Reality: Sample Room Craft vs. Mass Production Machines
A skilled sample maker can make a difficult pattern look surprisingly good.
They may ease a tight section by hand, slow down at a bulky junction, or press a seam until it behaves. That care is valuable, but it can also hide a problem that appears once the style reaches the production line.
Our bulk operation uses more than 10 lean production lines and over 330 specialized sewing and pressing machines. Equipment includes feed-off-the-arm double-needle chainstitch machines, automated pocket setters, and high-speed flat-felling folders.
The working conditions are quite different:
| Sample room | Bulk production |
|---|---|
| One technician may handle most of the garment | Operators carry out specialized operations |
| Pieces can be cut individually | Fabric is spread and cut for production quantities |
| Slow sewing allows frequent adjustments | Feed systems and folders need repeatable alignment |
| Hand easing and pressing can correct small difficulties | The pattern must work consistently at production speed |
Some chainstitch equipment can run at speeds around 4,500 RPM, although actual operating speed depends on the machine, fabric, and operation.
At that pace, a seam that needs constant hand correction becomes a production headache. Folders can jam, threads can break, and topstitching can drift.
A useful question during development is: “Can the line reproduce this without the sample maker’s special touch?” If the answer is unclear, the pattern or construction needs another look.
Stage 1: Proto Sample — Design and Silhouette
The Proto Sample is the first physical version of your design. It turns the sketch and denim tech pack into something you can hold, inspect, and try on.
At this point, the priority is the overall concept. Does the volume feel right? Is the rise balanced? Do the pockets belong on this silhouette?
There is little value in debating the exact shade of topstitching while the leg shape still needs rebuilding.
Primary Objectives: Silhouette, Rise, and Pocket Proportions
Keep the first review focused on three areas:
- Front and back rise curves: Check how the rise runs from the front closure, through the crotch, and up toward the back yoke. An insufficient back rise can leave the wearer exposed when seated. Poor front-rise shaping can create bunching or uncomfortable pressure.
- Rear pocket placement and angle: Pocket size and position have a strong effect on the back view. Check their relationship to the yoke, seat, and intended visual balance. A pocket can be neatly sewn and still sit too low.
- Leg silhouette: Follow the shape from the crotch to the hem. A vintage straight leg, barrel leg, and tapered crop each need a different distribution of volume.
For example, a barrel-leg design may look convincing in a flat drawing but lose its shape when the widest point sits too low. Moving that volume can matter far more than a small change to the hem opening.
That is exactly the kind of decision the Proto stage should help you make.
Fabric Selection: When to Use Substitute Denim vs. Actual Fabric
Ordering custom mill fabric before the shape is settled can tie up both money and time.
Custom yarn-dyed denim orders may involve minimums of 1,000–3,000 meters and lead times of roughly 30–45 days. Supplier requirements vary, so confirm them before building the development schedule.
For an early Proto, suitable stock denim is often a practical choice. The key word is suitable.
| Reasonable substitute | Shortcut to avoid |
|---|---|
| Similar weight in oz/yd² | Using rigid 14 oz denim to assess a 10 oz stretch style |
| Comparable weave, density, and yarn character | Treating open-end and ring-spun fabrics as interchangeable without checking their behavior |
| Similar measured stretch and recovery | Assuming two fabrics behave alike because their elastane percentages are close |
| Main-body denim with a comparable hand feel | Using lightweight pocketing twill to judge the body silhouette |
A 99/1 cotton-elastane fabric and a 98/2 blend may sometimes serve similar development purposes, but composition alone does not establish equivalence. Stretch, recovery, construction, and finishing all matter.
Choosing a close substitute lets our 15+ person R&D team start evaluating the shape while final fabric sourcing continues. It buys time without turning the Proto into a misleading reference.
Critical Watch-Outs: Rejecting Common Early Pattern Traps
Two issues deserve attention before you invest heavily in wash development:
- Crotch discomfort : A front crotch curve that is too tight or poorly shaped can press into the body and create horizontal tension lines around the fly. Check the curve and available room together; simply adding width elsewhere may not solve it.
- Leg twisting : Twill denim can develop torque during washing, causing a side seam to rotate toward the front of the leg. Right-hand twill is a familiar setting for this problem, though the result depends on fabric construction, finishing, grain alignment, and cutting. Review fabric skew control and panel balance with the mill and pattern cutter rather than relying on a blanket pattern adjustment.
The Proto may reveal warning signs. A washed sample is still needed to see how these issues develop.
Stage 2: Fit Sample — Measurements and Movement
Once the silhouette is approved, the conversation becomes more precise.
The Fit Sample checks finished measurements, comfort, and movement in the intended fabric and wash. It also helps establish a sound base for grading, although a good base-size fit does not replace checking other sizes.
A mannequin is useful here. A person is essential.
| Assessment | What a mannequin helps show | What a live model adds |
|---|---|---|
| Visual balance | Symmetry and overall silhouette | Drag lines that appear during movement |
| Waistband fit | Position at rest | Gaping when sitting or bending |
| Thigh room | Visible ease | Restriction during stepping and squatting |
| Rise | Basic shape and clearance | Pressure, pinching, and loss of coverage |
Fit Approval: Use the Intended Fabric and Finish
For a style intended to be sold washed, final fit approval needs the target wash.
Unwashed denim can retain sizing agents that make it feel stiff and hold it away from the body. Washing and drying alter that condition, allowing the fabric to soften, relax, or contract.
The development sequence is straightforward:
Sewn sample → intended finishing process → controlled drying and conditioning → measurement and live fitting
If your tech pack specifies a vintage stone-enzyme wash with a light tint, a quick rinse is not an adequate substitute. The fit sample needs to represent the planned process, including relevant parameters such as liquor ratio, treatment time, and drying conditions. Review the available denim wash processes when defining the finish.
Small sample drums and bulk laundry machines can behave differently, so the recipe also needs production validation.
For a genuinely raw-denim product, assess the garment in its intended sale condition and separately establish the expected care-related shrinkage. The principle is the same: test the product your customer will actually receive.
Live Fit Session Checklist: Stress-Testing Dynamic Movement
Jeans should work beyond the fitting-room mirror.
Ask the fit model to complete four simple movements:
- Deep squat: Look for crotch strain, restricted movement, and a rear waistband that pulls away from the body.
- Sit on a chair: Check fly bulging, pocket-mouth flare, and pressure across the waist and thighs.
- Lift a knee or step up: Watch for resistance through the thigh and knee.
- Bend forward: Assess lower-back coverage and whether the waistband stays in place.
Pay particular attention to these recurring problems:
- Waistband gaping: A contour waistband may help when a straight waistband cannot follow the body. Also check the yoke, seat, and waist-to-hip relationship before deciding on the correction.
- Thigh and knee binding: Tight horizontal drag lines near the pocket bottoms can indicate insufficient room. A crotch-extension adjustment of 1/4″–3/8″ may be worth testing, but the fitting evidence should determine the amount and location.
- Front fly bulging: If the fly forms a small tent when the model sits, examine the fly-facing length and its relationship to the front rise. Construction stiffness and excess front volume may also contribute.
Record what the model feels as well as what you see. “It pulls when I climb a step” can be more useful than another standing photograph.
How to Build Precise Tech Pack Revisions with POM Data
“Make the legs a little looser” sounds clear until three people interpret it three different ways.
Use POM codes, actual measurements, and annotated photographs to turn the fitting discussion into instructions the factory can follow.
An example revision log might look like this:
| POM Code | Description | Target | Actual | Difference | Review Instruction |
|---|---|---|---|---|---|
| WA01 | Waistband width, flat | 15.00″ | 15.60″ | +0.60″ | Review waistband curve and reduce finished width to target |
| TH02 | Thigh, 1″ below fork | 11.50″ | 11.10″ | −0.40″ | Add room at the appropriate pattern area; verify finished thigh |
| FR03 | Front rise, excluding band | 9.25″ | 9.25″ | 0.00″ | Keep measurement; confirm movement remains comfortable |
| BR04 | Back rise, excluding band | 13.50″ | 14.10″ | +0.60″ | Review yoke and rise balance; bring finished measurement to target |
Separate the required finished result from the proposed pattern correction. A 0.50-inch pattern change does not necessarily produce a 0.50-inch change after washing.
A tolerance of ±0.50″ may suit some denim measurements, but it should not be assigned to every point by default. Agree tolerances by POM, taking the fit sensitivity and production capability into account.
For photo comments, use visible arrows and specific wording, such as:
“Add 0.375″ at the indicated inner-thigh pattern edge, tapering to zero by mid-thigh. Recheck the finished thigh measurement after the target wash.”
Clarify whether an instruction applies to one pattern edge, a flat measurement, or the full circumference. That small detail can prevent an entire extra sample round.
Stage 3: Pre-Production Sample (PPS) — Bulk Approval
The PPS is where development decisions become a production commitment.
It should show that the approved design can be made with the final fabric, final trims, agreed wash, and intended production methods. A beautiful sample is only useful if the factory can repeat it.
Think of the PPS as the reference everyone will use when memory becomes unreliable—which tends to happen as soon as a busy production run begins.
The PPS Checklist: Final Fabric, Hardware, and Wash Aesthetics
Temporary materials should be resolved before PPS approval. Check every component against the final bill of materials. Our guide to custom denim buttons, rivets, patches, and zippers explains the trim details to settle before approval:
- Branded hardware: Inspect shank buttons, pocket rivets, and specified auto-locking zippers, including YKK or SAB where required. Look for sharp burrs, oxidation, loose attachments, and poor zipper operation.
- Back waistband patch: Confirm the specified leather, faux leather, or jacron patch survives the intended laundry process without unacceptable curling, bleeding, or distortion. If FSC-certified material is required, verify the supporting documentation.
- Internal branding: Compare pocket-bag printing, woven size tabs, care labels, and country-of-origin labels with the approved artwork.
- Wash appearance and placement: Review hand sanding (手擦), whiskers (猫须), distressing, and spray effects on the body. They should follow the intended wear pattern and look balanced.
Natural-looking wear does not always mean perfect mirror symmetry. Two identical white stripes across the thighs can look less convincing than subtle, controlled variation.
Photographs help communicate wash placement, but retain a physical reference for shade, texture, and hand feel. For decorated styles, include the embroidery, printing, and distressing specifications in the approval record.
Assembly Verification: Heavy Seam Intersections and Bar-Tack Strengths
Bulky junctions and high-stress areas deserve close inspection. A clean-looking stitch line on a flat panel tells you little about how the machine handled the crotch intersection.
Our operation uses more than 330 specialized garment machines, with machine settings, needles, and threads selected for the construction being sewn.
Start at the crotch cross-seam. Depending on the seam construction, this area can contain roughly eight layers of folded denim. Inspect it for:
- Skipped or broken stitches.
- Needle damage to fabric yarns.
- Uneven feeding through the thickest section.
- Inadequate reinforcement for the approved construction.
Then check back-pocket corners, the attachment points of all five belt loops where the design uses five, and the fly termination.
Bar-tacks commonly use patterns in the 28–42-stitch range, including 42-stitch patterns at suitable pocket stress points. Stitch count alone, however, does not prove strength. Tack dimensions, thread, needle choice, fabric condition, and placement all contribute.
A reinforcement should secure the garment without damaging the material it is meant to protect.
Golden Sample Approval Protocol and Factory Sign-Off
Once the PPS passes review, record the approval formally.
A practical process is:
- Prepare two matching PPS pairs using the approved materials and methods.
- Measure, inspect, and test the samples against the final requirements.
- Attach dated approval tags with the relevant signatures and tamper-evident seals.
- Keep one reference at the factory and one with the brand.
- Link both to the approved tech pack, BOM, wash standard, and revision record.
The factory reference should be accessible to cutting supervisors, sewing teams, laundry technicians, and QC staff while being protected from damage or fading. The brand copy provides a matching reference during shipment inspection.
If the agreed inspection plan uses AQL 2.5, document how it applies, together with defect classifications and other acceptance criteria. The sealed sample supports that inspection; it does not replace the written requirements.
Its contractual role should also be stated in the purchase agreement rather than left to assumption.
Jeans Sampling Lead Times, Costs, and Red Flags
A realistic sampling budget includes the revisions you hope not to need.
Schedules need the same treatment. Fabric availability, courier transit, feedback speed, laundry trials, and trim development all affect when the PPS can be approved.
The best time to discuss those dependencies is before anyone promises a launch date.
Realistic Timelines: From 1st Tech Pack to Approved PPS (4–8 Weeks)
A 4–8-week development window is a useful planning estimate when materials are available and reviews move promptly. Custom weaving, repeated fit corrections, and delayed approvals can extend it.
| Milestone | Indicative Duration | Main Work |
|---|---|---|
| Pattern and Proto development | 7–10 days | CAD pattern, cutting, and initial sewing |
| Transit and first fit review | 4–6 days | Courier delivery and live fitting |
| Wash development | 7–10 days | Wash trials, shade assessment, and recipe selection |
| Second fit assembly | 5–7 days | Pattern correction and target-wash sample |
| Custom hardware tooling | 12–15 days | Button and rivet mold development |
| Final PPS and approval | 5–7 days | Full-BOM assembly, review, and sealing |
These activities are not all sequential. Hardware tooling and some wash work can run alongside pattern development, which is why the total window is shorter than the sum of every row.
The estimate excludes custom mill weaving. Build that lead time into the calendar separately.
It also helps to agree who will return fit comments and by when. A sample sitting unopened for a week still uses a week.
Cost Breakdown: Sampling Fees, Wash Lab Charges, and Trim Molds
One pair of sample jeans carries work that would normally be spread across a production order: patternmaking, individual cutting, machine setup, and repeated checking.
Common planning figures include:
- Proto and fit sampling: Around 2–3 times the projected bulk FOB unit price per sample, depending on complexity and the supplier’s charging structure.
- Mini-wash charges: Approximately $50–$150 per run. Commercial laundry equipment may handle around 100–300 pairs per load, depending on garment weight and machine capacity; a small sample trial still needs labor, water, energy, and chemicals.
- Custom trim molds: Approximately $80–$250 per mold for items such as branded buttons, rivets, or patch embossing dies.
Treat these as indicative budgeting ranges and request an itemized quotation. Use the custom denim production cost guide to place sampling expenses within the wider sourcing budget.
Some factories credit sampling fees against a later bulk order. Others amortize or waive tooling charges once an agreed quantity is reached. Neither arrangement is automatic.
Confirm the credit conditions, revision charges, and tooling ownership in writing. A low sample quote is less attractive if every small correction arrives as a surprise invoice.
3 Red Flags That Signal It’s Time to Change Your Denim Factory
One imperfect sample is not necessarily a reason to change suppliers. The more useful test is whether the team can identify the cause and correct it consistently.
Watch for these patterns:
- Measurements keep drifting across three fit rounds.
If critical POMs move up and down by more than 0.75″ over three consecutive rounds, without an approved specification change, ask for the measurement, cutting, fabric, and wash records. Unexplained variation suggests the process is not under control. - Hand sanding looks rigid and mechanical.
Blocky white bars and abrupt whiskers can indicate weak execution when the brief calls for natural wear. The laundry should be able to explain how it will soften the transitions and improve placement. - The factory avoids proving the sample on production equipment.
“It will look better in bulk” is not a corrective action. If pocket seams pucker or topstitching is misaligned, request a corrected sample made with the intended production method before approval.
Use a structured jeans factory audit checklist to review recurring issues. A capable factory does not need every first attempt to be perfect. It does need a credible explanation, a workable correction, and evidence that the correction holds.
Jeans Sampling FAQ
What is the minimum quantity of samples we should produce for each gate?
For Proto and Fit rounds, 1–2 pieces per round is a common starting point.
For PPS, request 2–3 matching pairs. Keep one signed reference with the brand and another at the factory. A third is useful for destructive wash, tumble, or construction testing without damaging either approval reference.
Additional sizes or wash variations may require more samples.
Can we skip the Fit Sample stage if our Proto pattern fits reasonably well?
It is a risky shortcut, especially when the Proto uses substitute fabric or has not received the intended production wash.
A Proto can confirm the shape while still leaving major questions unanswered about shrinkage, stretch recovery, and movement. Test the actual production fabric under the planned finishing conditions before authorizing bulk cutting.
The distinction is simple: “The shape looks right” is an early milestone. “The finished product fits right” requires its own evidence.
How does Kaiping Lianwang Garment handle sample development?
Kaiping Lianwang Garment Co., LTD provides OEM and ODM denim development supported by more than 20 years of manufacturing experience, a 15+ person R&D team, and over 330 specialized garment machines.
Our services cover fabric sourcing and recommendations, in-house pattern development, sample construction, wash formulation, and quality control through the transition to bulk production.
The purpose of each sample round is to settle specific questions and carry those decisions into the next stage. Clear feedback and an up-to-date tech pack help keep that process moving.
Ready to develop your denim collection? Contact the technical team at Kaiping Lianwang Garment Co., LTD to review your tech pack, discuss fabric and wash requirements, and schedule your first Proto sample.

Recent Comments