
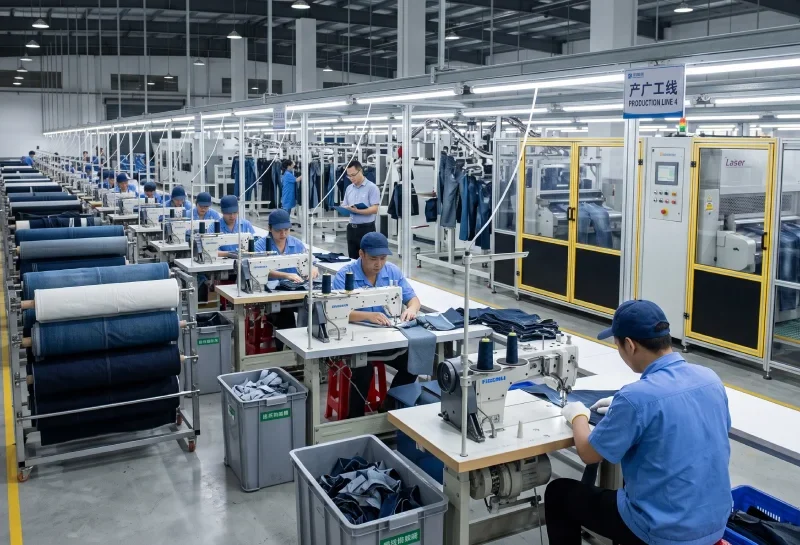
So you want to start your own denim brand. Awesome. But here’s the thing that used to stop almost everyone cold: you needed a ton of money and had to order thousands of pairs just to get a factory to pick up the phone. Not anymore. These days, agile manufacturing—yeah, that’s the fancy term—lets emerging DTC brands produce proper, premium small batches without betting the farm. Find the right low-MOQ jeans manufacturer, and suddenly you can test the market, see if people actually want your fit, protect your cash flow, and—maybe most importantly—avoid drowning in unsold inventory that’s gathering dust in your garage.
1. Demystifying Low MOQ Denim: Can You Really Make 50 Pairs of Jeans?
I get it. When I first heard “50 pairs,” I thought it was either a typo or some marketing gimmick. Can a factory actually bother with that number? The honest answer is yes—but whether it makes sense for your wallet depends entirely on how you produce them. The model you choose defines everything: your cost per pair, how much you can customize, and whether you’ll still be smiling when the invoice lands.
1.1 Full Custom vs. Ready-to-Brand: Understanding What 50-Piece MOQ Covers
When you start poking around small-batch denim production, you’ll run into two basic paths. Think of them like ordering coffee: you can either grab the house blend or go full pour-over with single-origin beans.
- Ready-to-Brand (White Label): This is the “house blend.” The factory already has existing silhouettes, stock fabrics, and set wash treatments. You just slap on your own branding—back patches, woven care labels, that kind of thing. The beauty? Almost zero development friction. No pattern headaches, no expensive trial-and-error. It’s fast, it’s cheap(er), and it gets you to market while your competitors are still arguing about stitch angles.
- Full Custom (Cut and Sew Denim): This is the pour-over. You control everything from the ground up—the rise, the inseam, custom hardware, even a wash recipe that’s uniquely yours. But here’s the catch: pattern drafting and grading cost the same whether you make 50 pairs or 500. So at 50 units, that overhead hits each pair like a brick. It’s doable, but you need to know what you’re signing up for.
1.2 The Financial Breakdown: Sample Development Fees vs. Bulk Unit Costs
Let’s talk money, because this is where it gets real. At 50 pieces, those fixed development costs hurt per unit—there’s no way around it. A typical prototype cycle includes pattern grading (around $80–$150), sample making ($120–$250 per prototype), and then the actual production. To give you a concrete picture, here’s how the numbers shake out compared to a larger run:
| Cost Component | 50-Piece Run (Per Unit Allocation) | 500-Piece Run (Per Unit Allocation) |
|---|---|---|
| Pattern & Grading Fee | $120 total ($2.40 / unit) | $120 total ($0.24 / unit) |
| Sample Development | $180 total ($3.60 / unit) | $180 total ($0.36 / unit) |
| Hardware Mold Setup | $150 total ($3.00 / unit) | $150 total ($0.30 / unit) |
| Cut & Sew + Fabric Cost | $22.00 / unit | $14.50 / unit |
| Wash House Surcharge | $6.00 / unit | $2.50 / unit |
| Estimated Total Unit Cost | ~$37.00 / unit | ~$20.90 / unit |
See that gap? You’re paying almost double per pair at 50 units. But here’s the trade-off: you’re not sitting on 450 pairs that nobody wants. In my book, that’s worth the premium—especially for your first drop.
2. Sourcing Dilemmas at 50 Pcs: Fabrics, Washes, and Custom Hardware
Low quantities come with their own weird bottlenecks. It’s not that factories don’t want to help—it’s that their machinery and supply chains are built for volume. The good news? Direct communication with the factory can smooth out most of these wrinkles before they become full-on headaches.
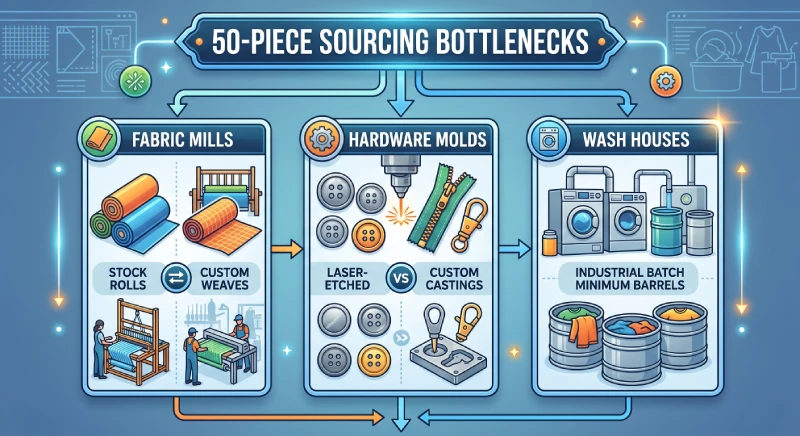
2.1 Stock Denim Fabrics vs. Custom Weaves: Avoiding Batch Color Variations
Here’s a hard truth: if you want a custom-milled fabric with your own weave, you’re usually looking at a minimum of 1,000 to 3,000 meters. For 50 pairs? That’s like ordering a whole cow for a single burger. So you’ll be working with stock denim rolls from the factory’s warehouse inventory.
Now, here’s the sneaky part—even stock rolls can vary in shade and stretch by 3% to 5% between different dye lots. I learned this the hard way when a friend’s first batch came back with two visibly different blues. The fix? Make damn sure your supplier pulls fabric from the same master roll for your entire run. It’s a small detail that saves a ton of heartache.
2.2 Solving the Hardware Dilemma: Low-Quantity Solutions for Rivets, Buttons & Patches
Custom metal molds are expensive—think 1,000 to 5,000 unit minimums just to justify the tooling. For a 50-pair run, that’s overkill. But you’ve got clever workarounds:
- Laser-Engraved Generic Trim: Grab standard zinc alloy buttons off the shelf, then laser-engrave your logo onto them. It looks custom, feels premium, and costs a fraction of die-casting.
- Custom Leather Patches (Low MOQ): This one’s actually doable—debossed genuine or faux-leather back patches can be ordered in lots as small as 50 to 100 units. It’s an easy win for branding.
- Stock Metal Finishes: Go with standard antique brass, matte black, or nickel shanks, then layer on custom hangtags and woven pocket bags to carry your brand story. Nobody’s going to flip your jeans over and say, “Wait, this rivet isn’t custom-molded.” They care about the overall vibe.
2.3 The Hidden Wash House Fee: Managing Minimum Batch Washing Surcharges
This one caught me off guard the first time. Industrial denim wash machines are huge—they handle 60 to 120 pairs per barrel. So when you send in 50 pairs, you’re paying for empty space. Wash houses charge a minimum batch fee, often $150 to $300, just to fire up the machine.
How do you swallow that? Look for factories that use smaller commercial drums or eco-friendly processes like ozone washing. They’re not only gentler on the planet—they can also run smaller loads without punishing your per-unit cost as badly.
3. Building a Production-Ready Denim Tech Pack for Small Batch Orders
If there’s one thing I’ve learned, it’s this: a sloppy tech pack is a one-way ticket to Misunderstanding City. The more detail you cram into your spec sheet, the fewer “surprises” show up in your final shipment.
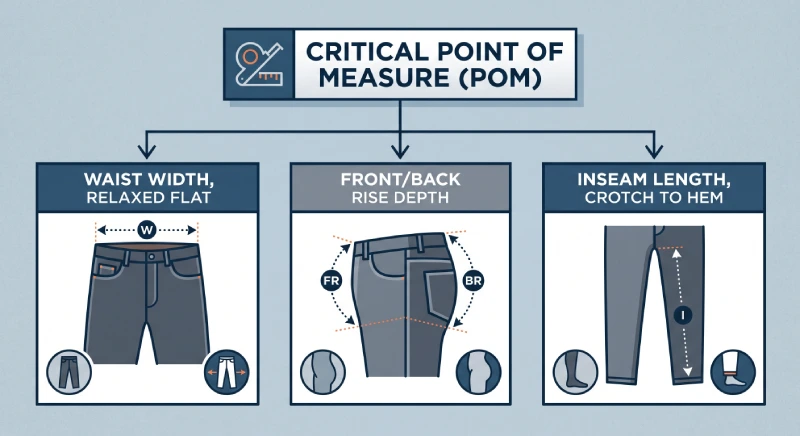
3.1 Essential Tech Pack Elements: Point of Measure (POM) & Wash Formulas
Think of your tech pack as the translator between your creative vision and the factory floor. It needs to cover:
- Pre-Wash vs. Post-Wash Measurements: Denim shrinks—and it doesn’t shrink evenly. The warp and weft directions behave differently. Record both your target finished dimensions and the raw pattern dimensions before washing. Trust me, you’ll thank yourself later.
- Stitching Specifications: Be specific. Thread weight (like #20 or #30 heavy-duty poly-core), stitch density (7 to 9 SPI—that’s stitches per inch), and seam styles (felled seams vs. chain stitching). Every detail matters.
- Bill of Materials (BOM): List everything—pocket lining weight, zipper specs (e.g., #4.5 or #5 YKK brass zipper), thread colors, patch placements. If it’s on the jeans, put it in the BOM.
3.2 Setting Clear Shrinkage Tolerances (Inseam, Waist & Rise Control)
Rigid denim can shrink a shocking 8% to 14% after that first wash. Stretch blends with elastane? Even more unpredictable. So you need to set firm tolerances:
- Waistband: +/−0.5 cm
- Front/Back Rise: +/−0.5 cm
- Inseam Length: +/−1.0 cm
- Thigh & Leg Opening: +/−0.5 cm
These aren’t suggestions—they’re your safety net.
4. The 5-Step Roadmap: From First Sample to 50 Finished Pairs
Here’s the journey, step by step. It’s not always glamorous, but it works.
Step 1: Fit Sample & Lab Dips
       │
       ▼
Step 2: PP Sample & Grading Sign-off
       │
       ▼
Step 3: Precision Cutting & High-Tension Stitching
       │
       ▼
Step 4: Wash Treatments & Distressing
       │
       ▼
Step 5: Trim Attachment & AQL 2.5 Inspection
4.1 Step 1: Fit Sample & Wash Lab Dip Approval
Your pattern maker whips up the first prototype. Before they sew a single stitch on the actual garment, the factory sends you wash swatches or lab dips. This is your chance to say, “More whiskering, please,” or “That tint is too yellow.” Fix it now, not later.
4.2 Step 2: Pre-Production (PP) Sample Sign-Off and Size Grading
Once you’re happy with the base fit—usually a size 32 for men or 27 for women—the digital pattern gets graded across your chosen size range. Then they make one final PP sample using the exact bulk fabric and trims. This is your last chance to catch any weirdness before full production.
4.3 Step 3: Fabric Cutting, Stamping, and High-Tension Stitching
Here’s a detail most people overlook: fabric rolls need to rest for about 24 hours to relax internal tension before cutting. Skip this, and your pieces might warp. Then heavy-duty denim machines take over—assembling pocket bags, attaching yokes, chain-stitching waistbands under serious tension. It’s loud, it’s fast, and it’s oddly satisfying to watch.
4.4 Step 4: Bulk Washing, Distressing, and Hand Scraping
Now the raw garments head to the wet processing facility. They go through enzyme desizing, stone abrasion, and—if you want that worn-in look—hand-scraping for whiskering. Some factories even use ozone tinting for a more sustainable finish. The result? Your jeans start to look like your jeans.
4.5 Step 5: Trim Attachment, Final Ironing, and AQL 2.5 Quality Inspection
Last leg. Rivets, shank buttons, and leather patches get pressed on with hydraulic tools. Then comes thread trimming, tunnel pressing, and the all-important AQL 2.5 quality audit. Only after that do they get polybagged and packed. It’s a thorough process—and it should be.
5. How to Vet and Select the Best Low MOQ Denim Manufacturer
Finding the right partner is like dating: you want someone reliable, communicative, and experienced enough to handle your quirks. A seasoned manufacturer brings not just machines, but stability and problem-solving chops.
Take Kaiping Lianwang Garment Co., LTD in Jiangmen, Guangdong, China—they’ve been at this for over 20 years. That’s two decades of learning what breaks, what fades, and what makes customers come back. They operate on a 7,000+ square meter factory floor with 330+ specialized machines, 10+ production lines, and over 150 workers, pushing out more than 600,000 pieces annually. They offer flexible OEM and ODM services, plus energy-saving lighting and boiler steam recovery systems—which, honestly, is nice to see on the sustainability front.
5.1 Red Flags to Avoid: Middlemen, Broker Markups, and Lack of In-House Wash Facilities
Let me save you some pain. Watch out for:
- Trading Brokers Posing as Factories: These middlemen add 25% to 40% in hidden fees and slow everything down. Ask for a real-time workshop walkthrough or factory floor footage. If they hesitate, walk away.
- Vague Sampling Timelines: Ask for a clear sampling schedule. Our standard sampling period is 10–20 days; confirm material readiness and any additional approval rounds before development starts.
- No Defect Accountability: A good factory stands behind its work. They should offer clear post-sale guarantees—replacements or refunds for defective units that slip through. If they don’t, that’s a giant red flag.
5.2 Key Questions to Ask Suppliers Before Wire-Transferring Deposits
Don’t be shy. Ask these directly:
- “Can your R&D team guide me on fabric weights, shrinkage values, and wash effects—one-on-one?”
- “If I hit certain order volumes down the line, do sample fees get refunded against bulk invoices?”
- “Will my 50-piece order get piece-by-piece inspection and testing documentation before shipping?”
- “Can you send a detailed unit-cost breakdown within 3 hours of reviewing my tech pack?”
5.3 Domestic (USA/EU) vs. Overseas (Asia/Latin America) for 50-Piece Launches
This is the classic trade-off:
- Domestic (USA/EU): Shipping is lightning-fast—3 to 7 days—and communication feels effortless. But you’ll pay $65–$120 per pair for cut, sew, and wash. That’s tough when you’re trying to keep DTC prices reasonable.
- Overseas (China/Asia): You get integrated supply chains, a wider fabric selection, advanced washing facilities, and baseline costs around $25–$40 per pair. Many modern overseas suppliers now offer 25–35-day bulk production and DDP door-to-door shipping, which simplifies logistics immensely. The catch? Lead time and distance—but if you plan ahead, it’s absolutely worth it.
6. Frequently Asked Questions (FAQs)
What is the average total startup budget to launch a 50-pair denim run?
Realistically, you’re looking at $2,200 to $3,800 to get your first drop out the door. That breaks down roughly like this:
- Fit and wash sample iterations: $250–$500
- Pattern digitization and grading: $100–$200
- Bulk production at $30–$45 per pair: $1,500–$2,250
- Express air shipping, customs, and door-to-door clearance: $350–$600
It’s not pocket change, but it’s far from the six-figure nightmares of the old days.
How long does the end-to-end sampling and bulk production process take?
Allow 35–55 days for sampling and bulk production combined, plus tech pack review, fit approval, and freight. Plan the full schedule using the following stages:
- Tech pack review and quotation: 1–2 business days.
- Sample development and lab dips: 10–20 days.
- Fit evaluation and sign-off: 5–7 days.
- Bulk cutting, stitching, and washing: 25–35 days.
- Air freight delivery (DDP): 5–8 business days.
Can I split 50 pairs across multiple sizes (e.g., 28 to 36 waist sizes)?
Absolutely. Most manufacturers let you spread your 50 pieces across 4 to 5 core sizes. A typical distribution might look like:
- Size 30: 8 pairs
- Size 32: 18 pairs
- Size 34: 16 pairs
- Size 36: 8 pairs
This way, you’re not betting everything on one waist size—and you’re covering the bulk of your target audience without overcommitting inventory. Smart, right?

Recent Comments