
Let’s be honest—starting a denim line sounds cool as hell. You picture your brand on stylish strangers, maybe a street-style shot or two. But getting there? That’s where the romance meets reality. Denim isn’t like cranking out a run of basic tees. It’s heavy, it shrinks, it fights you in the wash, and every little decision—from thread tension to button strength—can make or break your final product. I’ve seen otherwise smart founders trip over the same hidden pitfalls, so think of this guide as your shortcut around the most expensive lessons I’ve watched people learn the hard way.
1. Pre-Production Planning: Tech Packs & Realistic Budgeting
Here’s the thing about denim: you can’t wing it. A vague tech pack is basically an invitation for your factory to interpret your vision however they want—and trust me, their interpretation won’t match yours. Good planning here isn’t just smart; it’s the difference between a collection that makes you proud and a container full of expensive regrets.
Translating Denim Concepts into Production-Ready Tech Packs
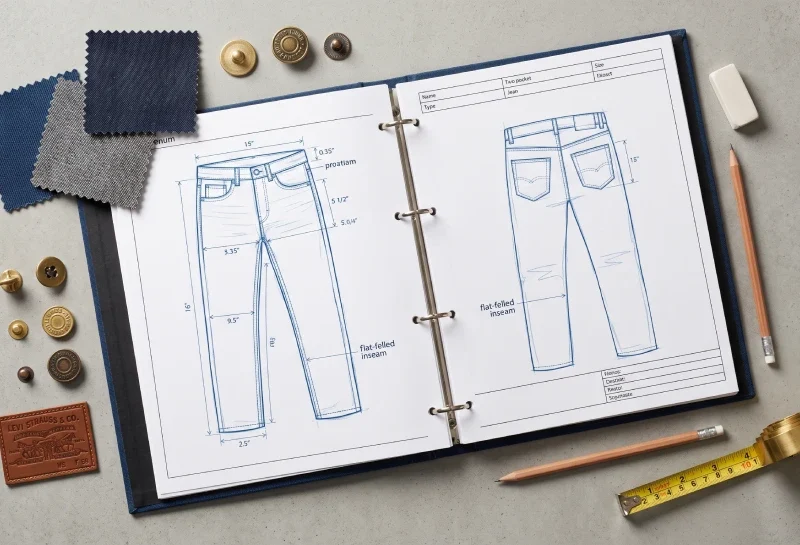
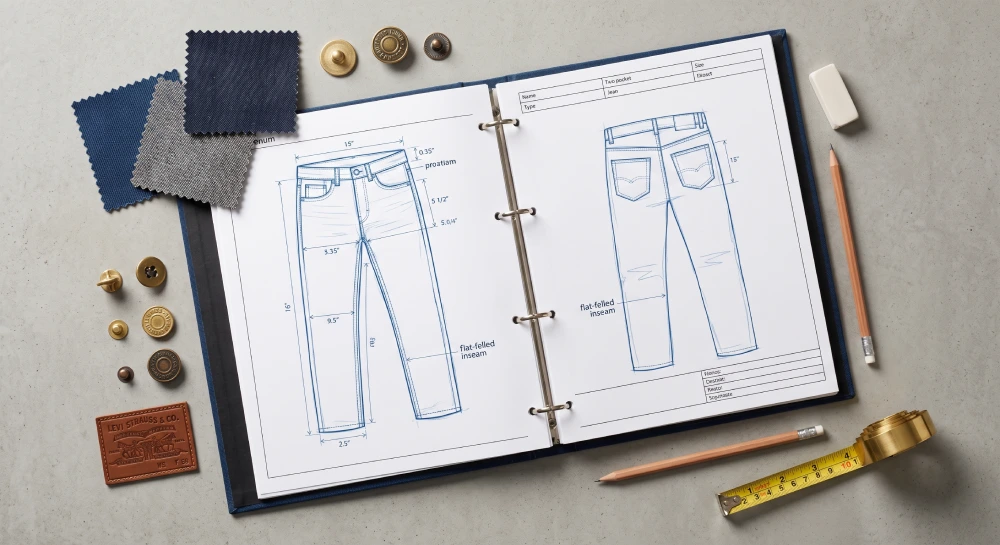
If your tech pack leaves room for guesswork, you’re already in trouble. I’m talking fabric weight down to the ounce (12 oz versus 14.5 oz changes everything), exact fiber composition, stitch gauge, thread color—even the specific seam types, like flat-felled inseams that give jeans that clean, tough finish. Beyond that, include a graded measurement chart so there’s no debate about size progressions. And don’t forget wash reference photos, vector diagrams for embroidery placement, leather patch specs, and hardware positioning. Think of it as giving your manufacturer a map, not a vague suggestion.
True Cost Breakdown: Fabric Sourcing, Custom Mold Fees, and Landed Costs
Budgeting for denim is like planning a road trip—you always forget the tolls. Here’s what I mean:
- Fabric & CMT: Raw denim alone usually swallows 50% to 60% of your cut-make-trim costs. That’s a big bite, so choose wisely.
- Custom Mold Fees: Want your own shank buttons, rivets, or embossed patch? Those molds aren’t free—expect to drop $80 to $250 per mold. It stings upfront, but it’s what gives your brand that proprietary feel.
- Landed Costs: Duties, port fees, freight—these sneak up on you. Heavyweight denim isn’t cheap to move, so build in a buffer. I always add 15% on top of my initial estimate just to breathe easier.
Avoiding the MOQ Trap: In-Stock Denim vs. Custom Weave Mills
Custom weave mills? Gorgeous fabrics, but they’ll ask for 3,000+ meters per run. For a small brand, that’s not a commitment—it’s a hostage situation. My workaround: source premium in-stock yardage from verified distributors. It’s like buying off the rack instead of bespoke tailoring—less glamorous, but you keep your cash flexible, test the market faster, and reorder in weeks instead of months. Trust me, your bank account will thank you.
2. From Proto to Fit: The Denim Sampling Phase
Sampling is where your 2D drawings become something you can actually touch, try on, and—if you’re honest—critique mercilessly. This phase is messy, iterative, and absolutely essential.
The Prototype Stage: Evaluating Silhouette, Rise, and Seam Construction
Your first prototype is a reality check. Slip it on a fit model and look at the front-to-back rise balance, the yoke angle, the crotch curve depth, and how the waistband hugs (or gapes). Pay special attention to stress points—pocket corners, fly opening, belt loops—and make sure they’re locked down with dual-needle chain stitching. That’s what keeps jeans from splitting at the seams when someone actually moves in them. I once ignored a subtle crotch curve issue, and we had to re-cut an entire size run. Never again.
The Sample vs. Bulk Fabric Trap: Controlling Shrinkage & Elasticity Drift
Here’s a dirty little secret: that perfect sample you signed off on? It might be made from pilot roll fabric, not your actual bulk dye lot. And raw cotton denim? It can shrink 8% to 15% in both directions after the first wash. If your sample doesn’t use fabric from the final bulk rolls, your production jeans will fit completely differently—guaranteed. So before you give the green light, demand swatches from the actual bulk fabric and test shrinkage yourself. It’s tedious, but it saves you from a hundred customer returns.
Wash Recipe Development: Laser, Enzyme, and Ozone Wash Testing
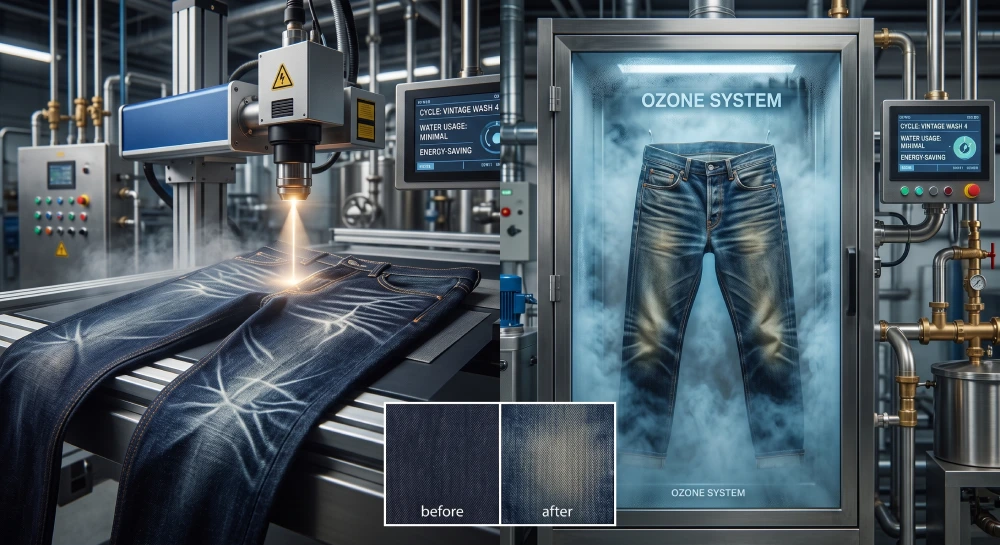
Washes are where denim gets its soul, but traditional methods are water-guzzling and harsh. These days, smarter factories use:
- Laser ablation for precise whiskering and fading—no manual scraping, no inconsistent patterns.
- Enzyme washing to soften the fibers without wrecking tensile strength.
- Ozone finishing to lighten shades with way less water and bleach than old-school rinses.
I’m a sucker for ozone because it gives that lived-in look without the environmental guilt trip. Plus, customers actually care about sustainable processing now—it’s a selling point, not a footnote.
3. Moving to Bulk: Pre-Production Approval & Size Grading
You’re almost there, but don’t rush. This phase locks in everything before you cut hundreds or thousands of pairs.
Pre-Production Sample (PPS) Sign-Off: Locking the Golden Standard
The PPS is your holy grail. It uses the actual bulk fabric, final custom trims, real packaging labels, and the approved wash tone—not approximations. Once you sign off, this golden sample becomes the non-negotiable standard for factory QC. I keep one hanging in my office as a constant reminder of what “right” looks like. If the factory deviates, you have a concrete reference to push back on.
Digital Denim Grading Rules: Preventing Fit Distortion in Extended Sizes
Grading denim isn’t just scaling up a circle. Waistbands, thigh widths, and back pocket proportions need non-linear adjustments—otherwise, your larger sizes end up with pockets that look comically tiny or sit in the wrong place, throwing off the whole rear balance. Good CAD grade rules account for this. I’ve seen brands ruin their extended size offering because they treated grading like a simple math problem. Don’t be that brand.
Trims & Hardware Mass Production: Tensile Strength and Plating Standards
Jeans take a beating. Buttons, rivets, and prongs get yanked, tugged, and stressed daily. Make sure every piece can handle at least 90 Newtons of pull-off force—that’s the industry benchmark. And don’t overlook electroplating: request a 24-hour salt-spray test to confirm finishes won’t tarnish or oxidize while sitting on retail shelves. Rusty rivets are not a good look.
4. Managing Bulk Denim Manufacturing & Wet Processing
This is where the rubber meets the road—or rather, where the denim meets the machines. Reliable execution demands serious equipment and disciplined floor control.
Industrial Production Workflow:
[Fabric Pre-Shrink / Rest] ➔ [Automated Spreading & Cutting] ➔ [Assembly Line Construction] ➔ [Wet Processing / Dye Lot Grouping] ➔ [100% QC Inspection]
Fabric Pre-Shrinking and Industrial Spreading/Cutting Workflows
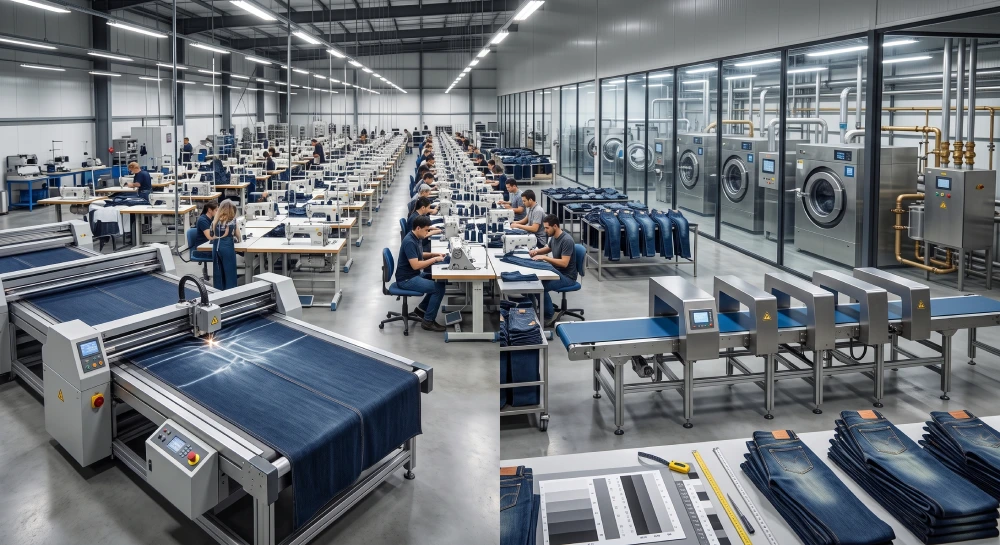
Before you cut a single panel, raw denim bolts need to rest—unrolled and conditioned for at least 24 hours to relieve internal tension. Skip this, and your fabric will warp mid-cut. Automated multi-ply spreaders then keep tension consistent across layers, so the top ply and bottom ply match perfectly. It sounds like overkill until you see what happens with uneven tension: twisted side seams that no amount of pressing can fix.
Batch Wet Processing: Managing Wash Consistency Across Dye Lots
Indigo dye lots are like snowflakes—no two are exactly alike. Factories should sort rolls by shade tags before washing, and then run automated wash cycles with fixed temperature curves and enzyme concentrations. This consistency is the only way to avoid one batch coming out lighter or darker than the next. I always ask for a few extra pairs from each dye lot to compare side-by-side under natural light. It’s a small step that catches big problems early.
In-Line Assembly Line Quality Checkpoints (Stitch Density & Bartack Reinforcements)
On the assembly line, you need eyes on every pair:
- Stitch density: Aim for 7 to 9 stitches per inch using heavy-duty core-spun thread. Anything less, and seams might pop under strain.
- Reinforcements: Bartacks at pocket corners, fly bases, and belt loop attachments are non-negotiable. These little clusters of tight stitching are what keep jeans from falling apart at the worst possible moment.
5. Quality Control, Packaging & Post-Production Logistics
After all that work, the last thing you want is for your jeans to arrive damaged, faded unevenly, or—god forbid—moldy. Post-production care is your safety net.
Establishing Denim AQL Inspection Standards (Measurements, Grayscale Color Shading)
Use ISO AQL 2.5/4.0 as your baseline. That means checking point-to-point measurements against approved grade sheets with a tolerance of ±0.5 cm. And for color consistency, use Grayscale evaluation—anything below Grade 4 gets flagged. It’s tedious, but it catches the kind of shade drift that customers definitely notice.
Proper Denim Finishing: Thread Trimming, Metal Detection, and Moisture Control
Three often-overlooked steps:
- Trim every loose thread—inside and out. It’s a small detail that screams quality.
- Run every garment through industrial 9-point conveyor metal detectors. Broken needles happen, and you do not want one ending up in a customer’s pair.
- Keep post-dryer moisture under 8%. Any higher, and you risk mold during ocean transit. A friend of mine lost an entire container to mildew because he skimped on moisture testing. That’s not a lesson you want to learn firsthand.
Choosing the Right Freight Mode for Heavyweight Apparel Cargo
Denim is heavy—0.6 to 0.9 kg per pair adds up fast. Air freight is great for your launch drop when speed matters more than cost. But for restocking, ocean freight (FCL or LCL) is your margin’s best friend. I usually split the difference: air for the first small batch to test the market, then sea for the big replenishment order once I know what’s selling.
Proven Manufacturing Partner Benchmark
| Factory Capability Metric | Verified Factory Standard |
|---|---|
| Manufacturing Experience | 20+ Years in Denim Production |
| Facility Scale | 7,000+ m² Floor Area |
| Production Team | 150+ Skilled Workers & Manual Specialists |
| Machinery Infrastructure | 330+ Specialized Garment Machines across 10+ Lines |
| R&D & Sampling Capacity | 15+ Technical R&D Engineers; 10–20-Day Sample Turnaround |
| Annual Production Output | 600,000+ Pieces Exported to US, EU, and AU Markets |
| Eco-Friendly Manufacturing | Steam Recovery & Energy-Saving Production Systems |
If your factory doesn’t at least tick these boxes, I’d be nervous. These aren’t nice-to-haves—they’re the baseline for consistent, high-quality denim at scale.
Frequently Asked Questions (FAQs)
What is the realistic turnaround time from first sample to bulk delivery?
With a dedicated R&D team, you can have a sample in hand within 10–20 days. After the PPS gets the thumbs-up, bulk production runs 25–35 days. Allow 35–55 days for sampling and bulk production combined, plus any additional material sourcing, approval time, and shipping.
How can small brands avoid size discrepancies caused by post-wash shrinkage?
Don’t let pattern makers use generic shrinkage data. Insist they test actual bulk fabric swatches and adjust CAD patterns accordingly. Factories with in-house wet processing can do this pre-cutting, which is a huge advantage. It’s one of those boring details that saves you from a PR nightmare later.
Is it possible to order custom branded hardware on a low-MOQ production run?
Absolutely—if you choose the right partner. Many factories offer flexible OEM runs with custom hardware batches as small as 500 to 1,000 units. And here’s a pro tip: ask them to keep your unused hardware in their inventory for future orders. That way, you don’t pay for new molds every time you reorder.

Recent Comments